
With a long and brutal background of setting up Oracle RAC clusters and various other MPP database systems, I was enormously pleased with how easy it is to set up and monitor a multi-node Apache Cassandra cluster. In this article, I’ll walk you through the process to build a cluster in your own shop step-by-step so you can see what I mean.
For the tutorial below, I’ll be using 4 Ubuntu 11.04 Linux machines that I’ve setup on Rackspace. Each has 2GB of RAM and 80GB of hard disk space. If you’re not using Ubuntu, don’t worry as the process below works for any Linux platform (e.g. Red Hat, CentOS, Debian, etc.)
First Things First
There are a few prerequisites that you’ll need to make sure are on your boxes before you begin installing Apache Cassandra and the monitoring / management tool I’ll be using, which is DataStax OpsCenter. Specifically, you’ll need:
- Java 1.6 or higher
- Python 2.6 or higher
- OpenSSL
You can check these prerequisites on your Linux boxes by entering the following commands and viewing the output:
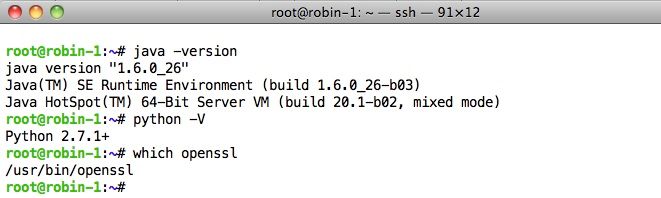
If you don’t have these prerequisites on your machines, follow the steps in the install sections of the DataStax documentation for installing them.
Also, if you have a firewall enabled, be sure that you open ports that are needed by Cassandra and OpsCenter. If you don’t do this, when you start Cassandra on each node it will acts as a standalone database server rather than as a database cluster and OpsCenter likely won’t work.
The ports you need to open for Cassandra are 7000 and 9160. For OpsCenter you need to open 7199, 8888, 61620, and 61621.
For each port you need to open, you can use the iptables command similar to this:
iptables -A INPUT -p tcp --dport 7000 -j ACCEPT
You’ll want to enter a command like the above on all machines that make up your cluster and for all ports that need to be opened.
Download the Software
The obvious next step once you’ve confirmed the few needed prerequisites is to get your hands on the software. For this article, I’ll be using the DataStax Community Edition bundle, which contains the latest and most stable Apache Cassandra version, along with the Cassandra Query Language (CQL) utility, a sample database and application, and a free edition of DataStax OpsCenter, which is the tool you’ll want to use for managing and monitoring your Cassandra cluster.
DataStax makes available rpm, deb, and tar downloads for Linux. For this tutorial, I’ll just use the tar download file.
You can obtain the DataStax Community Edition from the downloads page, or you can issue wget commands directly from your Linux machines to grab the software as well.
For example, to download the most recent version of the DataStax Community Edition Server using wget, you would enter the following from a terminal window: wget http://downloads.datastax.com/community/dsc.tar.gz
You’ll want to download the DataStax Community Edition tar file to all your machines that you want included in your new Cassandra cluster.
Unpack the Download Cassandra Community Server File
Next, on each of your machines, move the tar file you’ve downloaded to the directory where you’d like to install things and unzip it: tar -xzf dsc.tar.gz
Generate the Tokens for the Cluster
One of the great features of Cassandra is that it automatically distributes the data in a cluster evenly between all the machines via a hashing algorithm that’s applied to incoming data. All you have to do is assign a token to each machine in the cluster, which is a numerical identifier that determines the machine’s position in the cluster and the range of data that each machine is responsible for.
DataStax supplies a small python program that makes the generation of tokens very easy. To use it:
- Create a new file on one of your Linux machines using your favorite editor
- Copy and paste the following code into it:
- 1
- 2
- 3
- 4
- 5
- 6
- 7
- 8
#! /usr/bin/python
import sys
if (len(sys.argv) > 1):
    num=int(sys.argv[1])
else:
    num=int(raw_input("How many nodes are in your cluster? "))
for i in range(0, num):
print 'token %d: %d' % (i, (i*(2**127)/num))Then, execute the new script, input the number of nodes you intend to use for your new Cassandra cluster, and the script will output the tokens for each node of your new cluster:
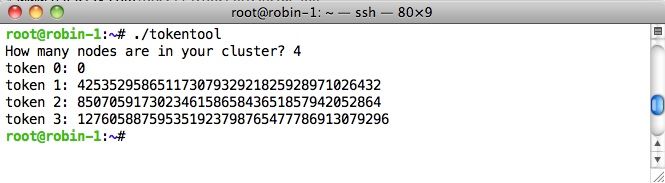
Record the tokens because we’ll need them for the next step.
Next, Set a Few Parameters
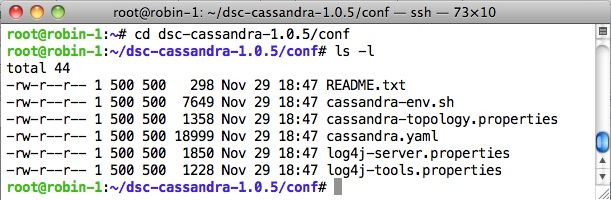
There are a few startup parameters you’ll want to set for your new Cassandra cluster. Some are mandatory and others are optional. All are contained in the cassandra.yamlfile that can be found in the /conf subdirectory that’s directly under the directory where you unzipped the DataStax Community Edition server package:
The mandatory parameters you’ll need to set are:
- initial_token: for each machine in your cluster, copy one of the tokens you generated and paste it in. Start with token 0 and assign a unique token to each box.
- listen_address: make sure this parameter is set to the IP address or name of the machine
- seeds: input the IP address or server name of the first node you want to use in your cluster. When a node first starts, it contacts a seed node to bootstrap the gossip communication process. The seed node designation has no purpose other than bootstrapping new nodes joining the cluster. Seed nodes are not a single point of failure and you can input multiple seed nodes if you’d like.
Optional parameters you can set are:
- cluster_name: is (surprise!) the name of your cluster. You can leave “Test Cluster” in if you’d like or give it a more meaningful name.
- data_file_directories, commitlog_directory, saved_caches_directory: Like many other database systems, Cassandra has data and log files. And like other databases, you’ll get better performance if you separate the data and log files so that they’re on different drives/devices. This isn’t necessary if you’re just getting your feet wet with Cassandra, but you’ll want to create separate directories for these if/when you go into production, and include those directories here. If you leave them blank, Cassandra will just use the /var/lib directory for everything.
Of course, there are other parameters you can tweak in the cassandra.yaml file for performance tuning, etc., but you’re done for now. Save your changes to the cassandra.yaml file once you’re finished.
Start your Cluster
You’re now ready to start up your cluster. Start your nodes by going to the [installation directory]/bin directory on each machine and executing the ./cassandrascript:
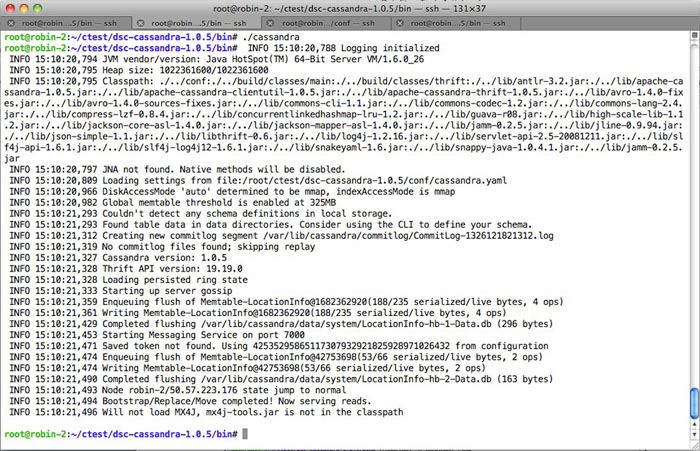
Give the nodes a few seconds to establish themselves in the ring and then check the status of your cluster by using the nodetool utility in the bin directory (on any node in your cluster), and entering the command: ./nodetool –h localhost ring:
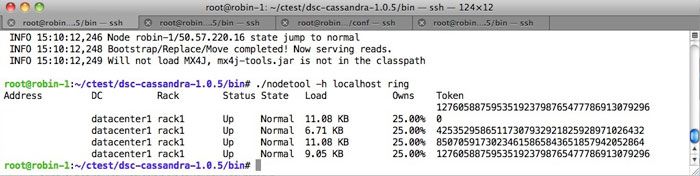
You should see the nodes that comprise your cluster along with their status and some other pieces of information.
Pretty easy eh? Download/unzip a tar file, set a couple of config params, start your nodes, and you’ve got a very sophisticated, distributed, scalable database ready for action.
Now, let’s get things set up to easily monitor and manage your new cluster.
Installing DataStax OpsCenter
DataStax OpsCenter is a visual management and monitoring solution for Apache Cassandra that lets you easily see what’s going on in your database cluster, manage objects, and more. There are two editions of DataStax OpsCenter: a free community edition and a paid enterprise edition. For this article, we’ll work with the community edition, but the installation for both is the same.
With DataStax OpsCenter, you’ll install the main OpsCenter service on one of your nodes and agents on every node. You can choose any node for the OpsCenter service; I’ll just use my first node.
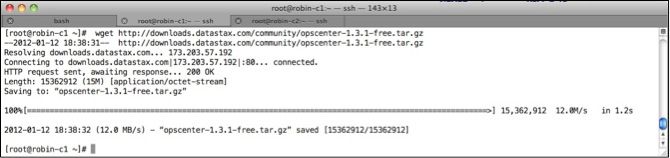
Download the OpsCenter tar file onto one of your machines. For example, using wget for the free 1.3.1 community edition of OpsCenter looks like this:
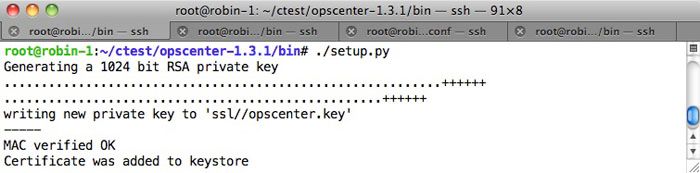
Unzip the file (tar -xzf). Then go to the OpsCenter installation directory and then to the bin directory. Enter the command: ./setup.py (which used to be called create-agent-tarball; if you’re using OpsCenter 1.3 or below, this is what the setup routine is called in those versions), which will set up SSL for OpsCenter and do a few other housekeeping chores:
Next, go to the conf directory and edit the opscenterd.conf file. You need to change the interface parameter in the file from 127.0.0.1 (defaults to just the localhostmachine) to 0.0.0.0 so you can get to OpsCenter from any machine.
Then, start DataStax OpsCenter up as a background process, by executing ./opscenter &:
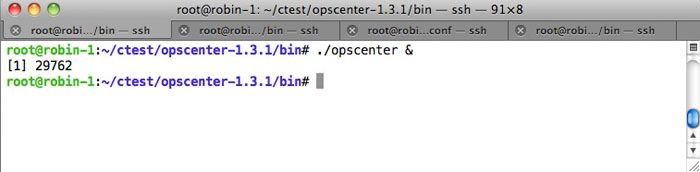
Now, you have the main OpsCenter service running on one of your nodes. Next, we have to install the OpsCenter agent on each node in your new cluster.
For every node in your cluster, follow these instructions:
- Make a directory on each machine for the OpsCenter agent (e.g. mkdir opscenteragent)
- The setup script for OpsCenter created a file called agent.tar.gz on your first machine. Copy that file (e.g. scp) to all the machines in your cluster and put it into the new directory you just created.
- Unzip the agent.tar.gz file
- Next, you need to set the agent to point to the main OpsCenter machine (the one you just installed the primary OpsCenter service on) and also monitor the current machine you are on. This is done by executing the setup script in the bin subdirectory of the agent directory and passing it first the machine IP or name of where the OpsCenter main service is running followed by the local machine’s address or name: ./setup main-opscenter-machine-name-or-ip local-machine-name-or-ip
- Start up the agent by executing the opscenter-agent script.
You can now invoke the DataStax OpsCenter dashboard from any Google Chrome or Firefox web browser by typing in the following on the browser’s address bar: http://[IP address of the OpsCenter service machine]:8888/opscenter/index.html:
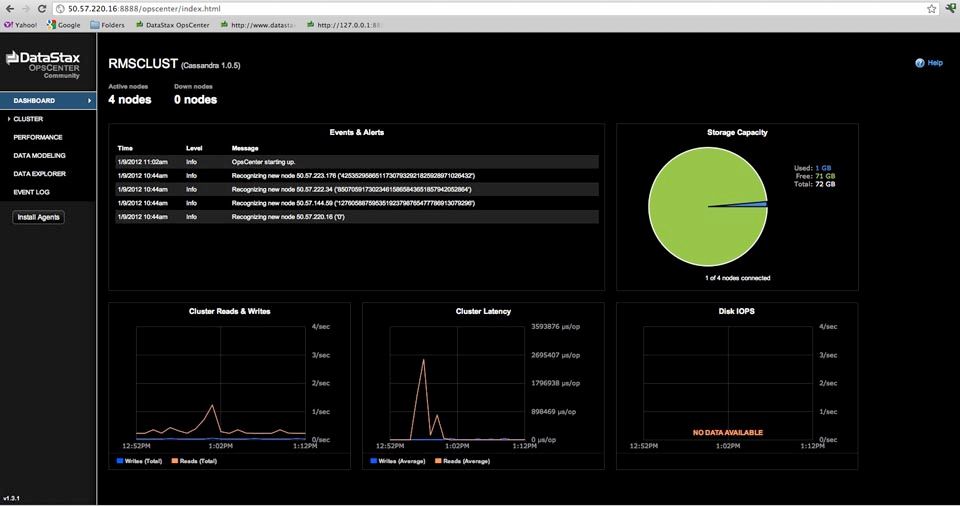
The web-based DataStax OpsCenter interface is very straightforward to use when it comes to monitoring and managing your new Cassandra cluster. Use the left-hand side navigation bar to move between activity and performance monitoring views, running utility functions on nodes (via the Cluster option), managing objects, and more.
Congratulations – you’ve got a multi-node Cassandra cluster up and running along with your visual management and monitor solution.
Conclusion
We’ve reached the end of this short article on how to setup and start monitoring a multi-node Cassandra cluster on Linux. Look for some more articles on setting up Cassandra on Amazon EC2 and other platforms in the future.
To download either the DataStax Community or Enterprise editions, please visit the downloads page.
Thanks for your support of Apache Cassandra and DataStax.