We recently announced the upcoming release of DataStax Enterprise (DSE) 6.9 – the next iteration in the line of self-managed enterprise-grade products from DataStax built on Apache Cassandra®, offering DSE customers a simple upgrade path that adds vector database capabilities for generative AI use cases.
The headline here is the addition of vector search; developers can now integrate powerful generative AI capabilities into their workloads running on DSE. Vector search in DSE 6.9 is powered by the JVector search engine that is 10x faster than traditional Lucene-based search.
In this post, you can take vector search for a spin with the early preview release of DSE 6.9; you’ll see how easy it is to build a classic talk-to-your-docs Q&A chatbot with a few lines of code.
If you need a primer on vector search, check out this guide. DSE 6.9 also adds Java 11 support, improvements in Storage-Attached Indexes (SAI) with analyzers for enhanced search relevance plus OR operator support, and cloud-native operations and observability with Mission Control.
OK - let’s dive in!
Install DSE 6.9
OPTION 1 - Docker installation
(for Windows, Linux & Mac users)
STEP 1 - Create a DSE 6.9 container with the following command:
$ docker run \
    -e DS_LICENSE=accept \
    -p 9042:9042 \
    --name dse69preview \
    -d cr.dtsx.io/datastax/dse-server:6.9.0-early-preview
STEP 2 - Monitor the startup sequence with:
$ docker logs -f dse69previewWhen DSE has initialized and is ready, you should see log entries which look like:
INFO ... Server.java:226 - Starting listening for CQL clients on /0.0.0.0:9042 (unencrypted)...INFO ... DseDaemon.java:818 - DSE startup complete.
Your DSE 6.9 cluster is now operational and ready to use. To connect to the cluster with cqlsh, run:
$ docker exec -it dse69preview cqlshOPTION 2 - Binary tarball installation
(for Linux & Mac users only)
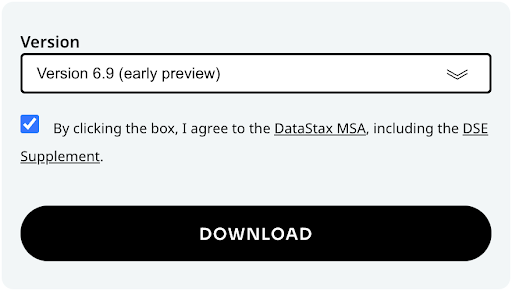
STEP 1 - Visit downloads.datastax.com on a browser.
STEP 2 - Select Version 6.9 from the dropdown box and click on the checkbox to accept the terms and conditions then click the Download button:
STEP 3 - Unpack the zipped tarball on the command line:
$ cd <download_location>
$ tar xzf dse-6.9.0-early-preview-bin.tar.gz
$ cd dse-6.9.0-early-preview
STEP 4 - (Optional) DSE writes application logs to /var/log/ by default. Add the following line near the top of bin/dse-env.sh to save the logs in dse-6.9.0-early-preview/log/ instead:
export CASSANDRA_LOG_DIR="/path/to/dse-6.9.0-early-preview/log"STEP 5 - (Optional) DSE writes data files to /var/lib/cassandra/ by default. Modify the following properties in resources/cassandra/conf/cassandra.yaml to save the data in dse-6.9.0-early-preview/* instead:
hints_directory: /path/to/dse-6.9.0-early-preview/hints

data_file_directories:
     - /path/to/dse-6.9.0-early-preview/data

metadata_directory: /path/to/dse-6.9.0-early-preview/metadata

commitlog_directory: /path/to/dse-6.9.0-early-preview/commitlog

cdc_raw_directory: /path/to/dse-6.9.0-early-preview/cdc_raw

saved_caches_directory: /path/to/dse-6.9.0-early-preview/saved_caches
STEP 6 - Start DSE:
$ bin/dse cassandraSTEP 7 - Monitor the startup sequence with:
$ tail -f log/system.logWhen DSE has initialized and is ready, you should see log entries that look like:
INFO ... Server.java:226 - Starting listening for CQL clients on localhost/127.0.0.1:9042 (unencrypted)...

INFO ... DseDaemon.java:818 - DSE startup complete.
Your DSE 6.9 cluster is now operational and ready to use. To connect to the cluster with cqlsh, run:$ bin/cqlsh
App prerequisites
The app we are building will use the demo keyspace (similar to the concept of namespace in relational databases) by default. Connect to your cluster with cqlsh to create demo:
CREATE KEYSPACE demo WITH replication = {
    'class': 'SimpleStrategy',
    'replication_factor': 1
};
We will be using several software packages to build a RAG application with LangChain and LlamaIndex. To make it simple for developers we've put together RAGStack, a curated production-ready stack of open-source software which we will install with a single command:
$ pip install -qU ragstack-aiFor this demo, download the Vector Search for Generative AI Apps whitepaper (PDF) and place it in the data/ directory.
$ mkdir dataFinally, we will be using OpenAI's gpt-3.5-turbo LLM and text-embedding-ada-002 model so you'll need your API key from platform.openai.com. If you don't already have one, simply create a new key from the API keys section of your profile.
Document Q&A app
Let's build the app step-by-step in Python!
First, we'll connect to the DSE cluster running locally using the Python driver for Cassandra and CassIO:
from cassandra.cluster import Cluster

cluster = Cluster(["127.0.0.1"])
session = cluster.connect()
import cassio

cassio.init(session=session, keyspace="demo",)
Supply your OpenAI API key:
openai.api_key = "sk-..."Load the documents in the data/ directory into memory:
from llama_index.core import SimpleDirectoryReader

documents = SimpleDirectoryReader('data').load_data()
Create and initialize the vector store instance with:
from llama_index.vector_stores.cassandra import CassandraVectorStore

cassandra_store = CassandraVectorStore(
    table='ragdemo', embedding_dimension=1536
)
Create a storage context for the vector store:
from llama_index.core import StorageContext

storage_context = StorageContext.from_defaults(
    vector_store=cassandra_store
)
With a single line of code, (1) we'll split the documents into "chunks", (2) generate vector embeddings for each chunk, and (3) store both the chunk of text and corresponding embedding in the ragdemo table in DSE:
from llama_index.core import VectorStoreIndex

index = VectorStoreIndex.from_documents(
    documents, storage_context=storage_context
)
Now we can start asking questions about the documents. Here's a simple example question:
query_engine = index.as_query_engine()
response = query_engine.query("What is vector search?")
print(response)
And here's the response:
Vector search is a method used to find related objects that share similar attributes or characteristics. It involves using a specific type of machine learning model called embeddings to describe objects and their context. This approach allows vector search to locate similar data without requiring prior knowledge of the exact search query.You can modify the code above to ask any question you want about the whitepaper and be amazed at the answers you get back. Take it even further and upload any document you want and ask the app all sorts of questions about the documents.
Next steps
How about uploading your company's operating manuals? Textbooks? Web pages? Ask questions and get answers based on the documents you uploaded. Imagine the possibilities!
Download the complete code for the demo on GitHub. If you have any questions or would like to learn more, contact us today!