Today we announced the release of a plugin for Firebase's Genkit framework for building generative AI applications. Genkit is a powerful framework that provides the primitives for building production-quality GenAI applications. From easy access to models, prompts, indexers, and retrievers, to more advanced features like flows, traces, and evals, its power lies in making it easy to do the right thing while building GenAI applications.
In this post, we'll take a look at how to use the Astra DB plugin for Genkit to build a retrieval-augmented generation application with Genkit.
Building a RAG application
Let's build a RAG application from scratch and see how straightforward it can be with Genkit and Astra DB. First, you'll need a Gemini API key, which you can get from Google AI Studio.
You’ll also need an Astra DB database to store your data and vectors; if you don't already have an account you can sign up for a free DataStax account.
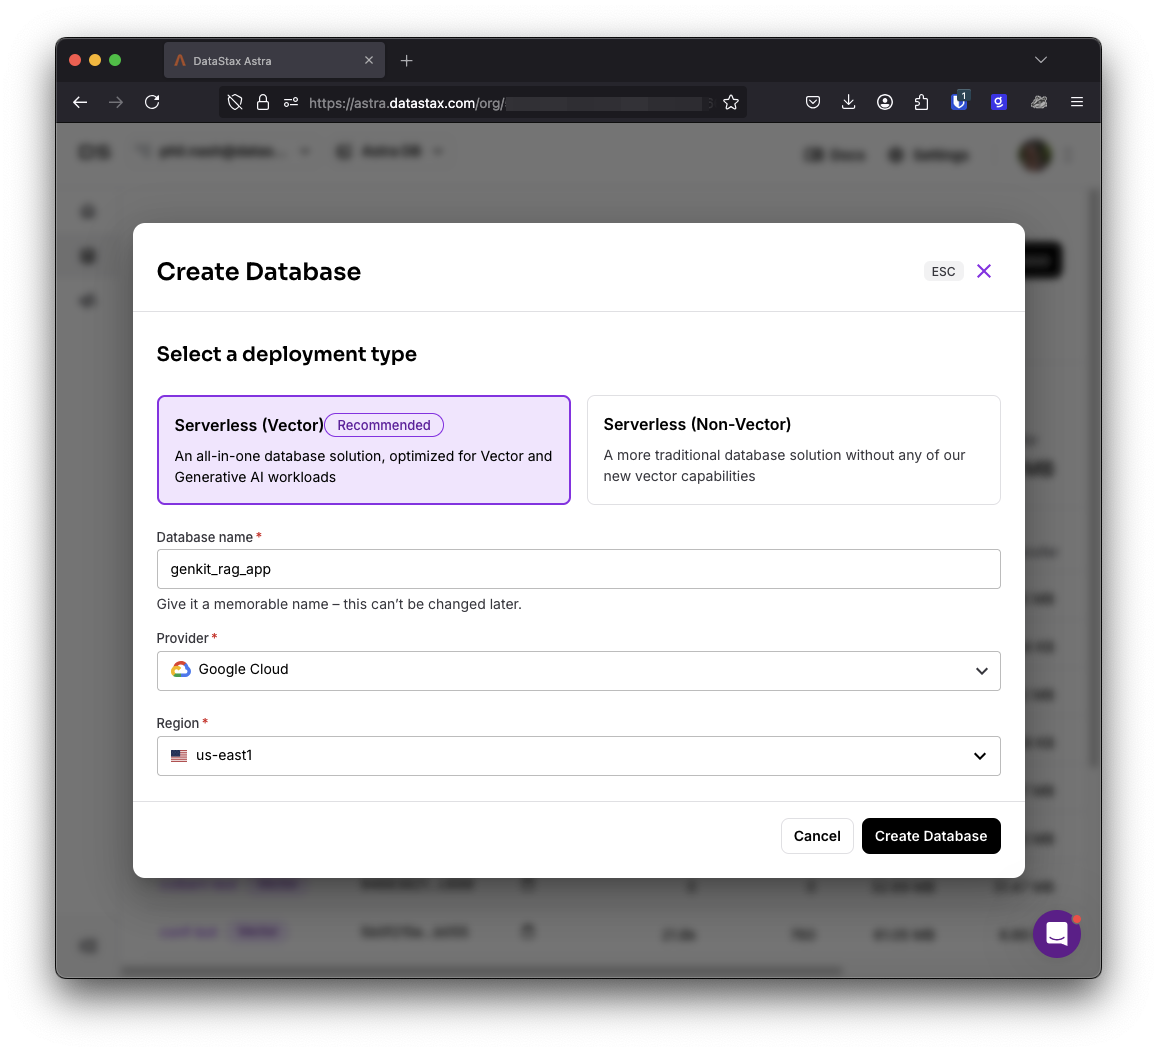
Start by creating a new Astra DB database; give it a name and choose a cloud and region. This takes a couple of minutes, so carry on with the next steps while it starts up.
Setting up the app
Create a directory for your app and install the dependencies you'll need:
mkdir genkit-astra-db-rag
cd genkit-astra-db-rag
npm init --yes
npm install genkit @genkit-ai/googleai genkitx-astra-db
npm install genkit-cli tsx -D
Create a file to work in:
touch index.tsOpen index.ts and import the dependencies you installed:
import { z, genkit, Document } from "genkit";
import { textEmbedding004, googleAI, gemini20Flash } from "@genkit-ai/googleai";
import {
  astraDBIndexerRef,
  astraDBRetrieverRef,
  astraDB,
} from "genkitx-astra-db";
In this case, we're pulling in Google's text-embedding-004 model for creating vector embeddings, and the Gemini Flash 2.0 model for generation.
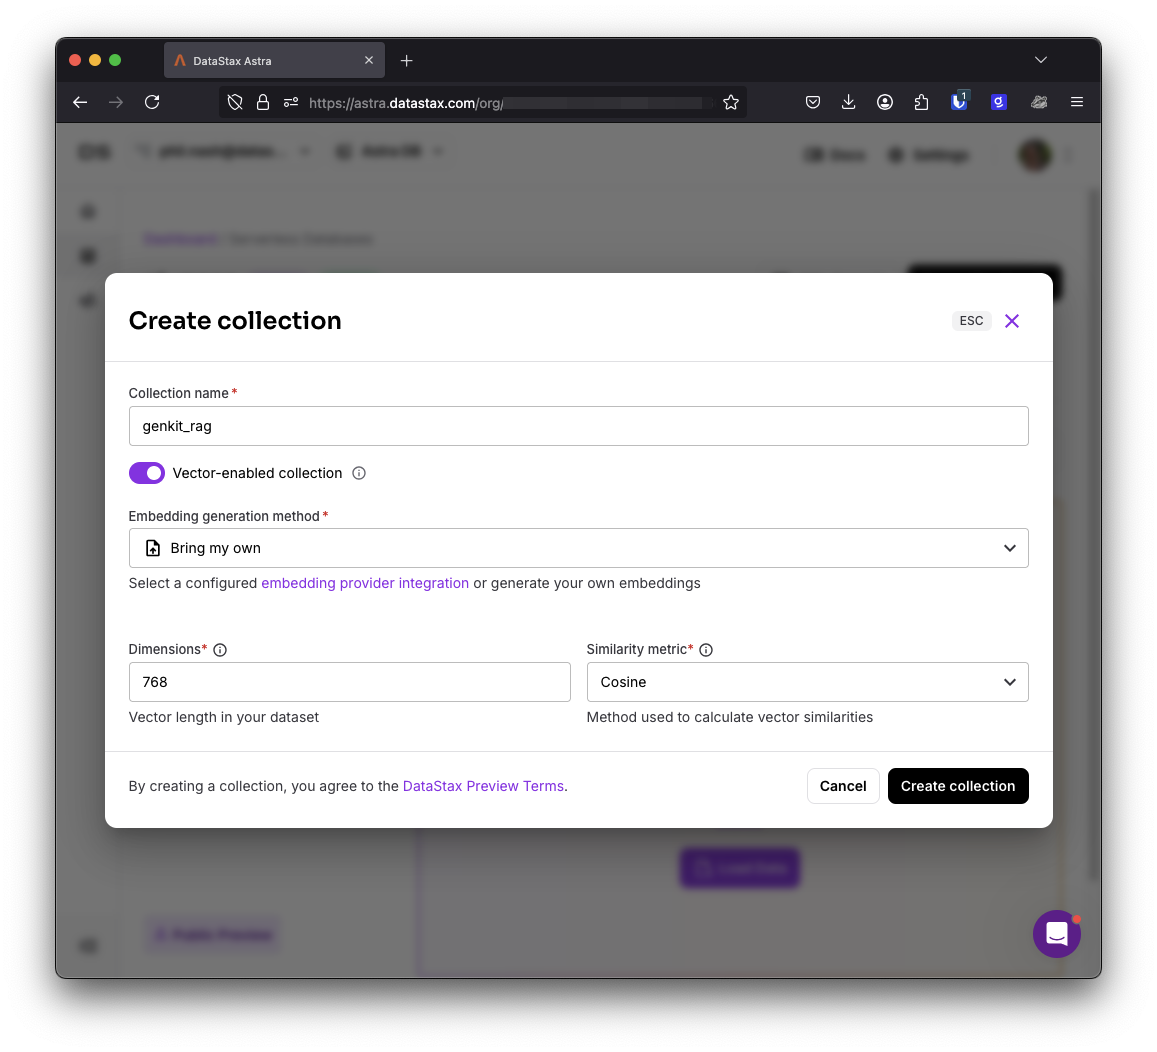
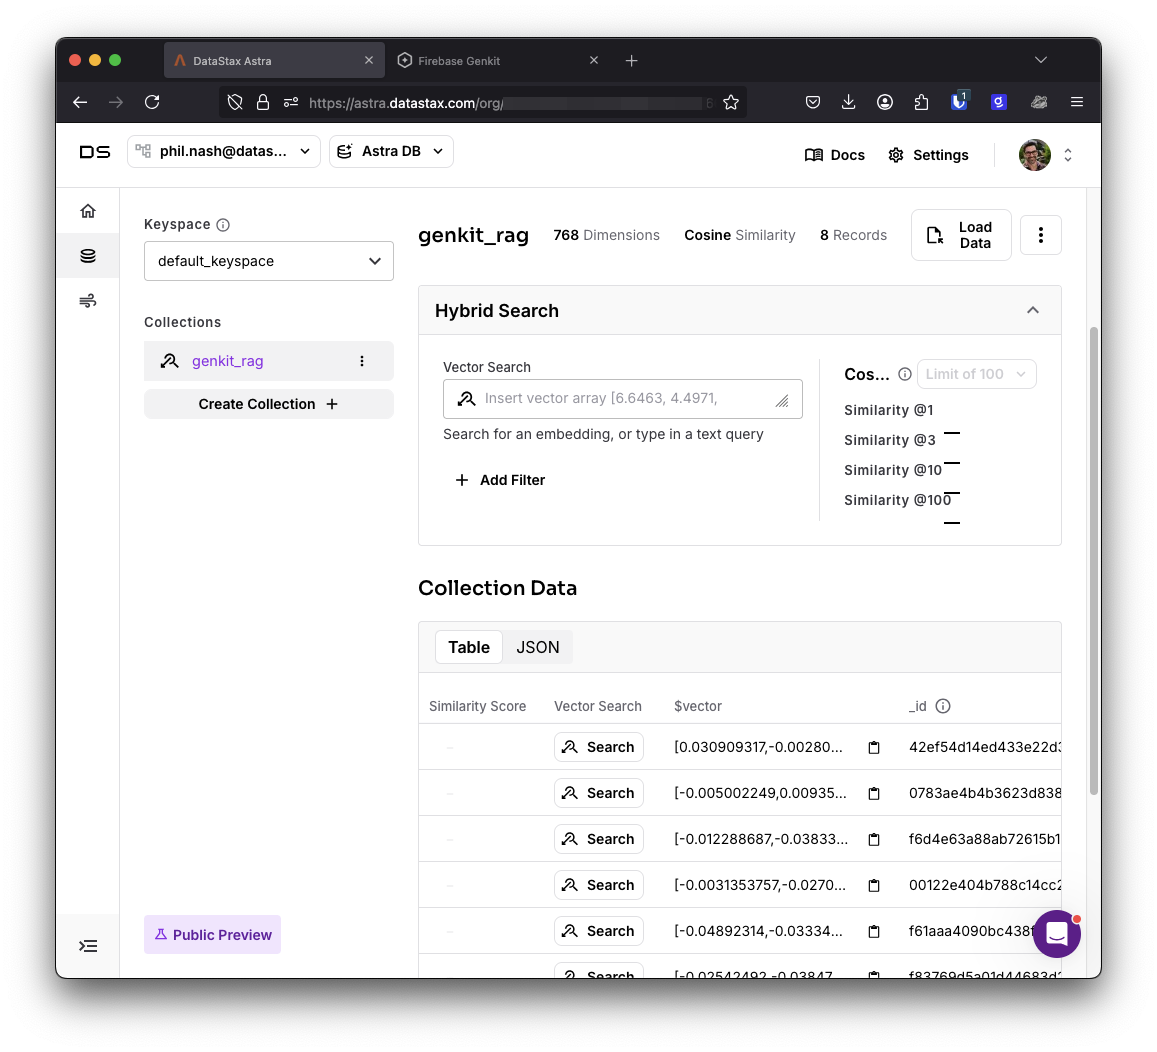
It's about time to create a collection in which we can store our vectors. Hopefully your database has been created now, so head to the DataStax dashboard, choose your database, open the Data Explorer, and create a collection. Give the collection a name and choose "Bring my own" for the embedding generation method. The text-embedding-004 model creates vectors with 768 dimensions (though you can choose fewer), so enter 768 for the number of dimensions and choose "Cosine" for the similarity metric.
Once you've created the collection, you'll need the API endpoint of the database, the collection name and to generate an API token.
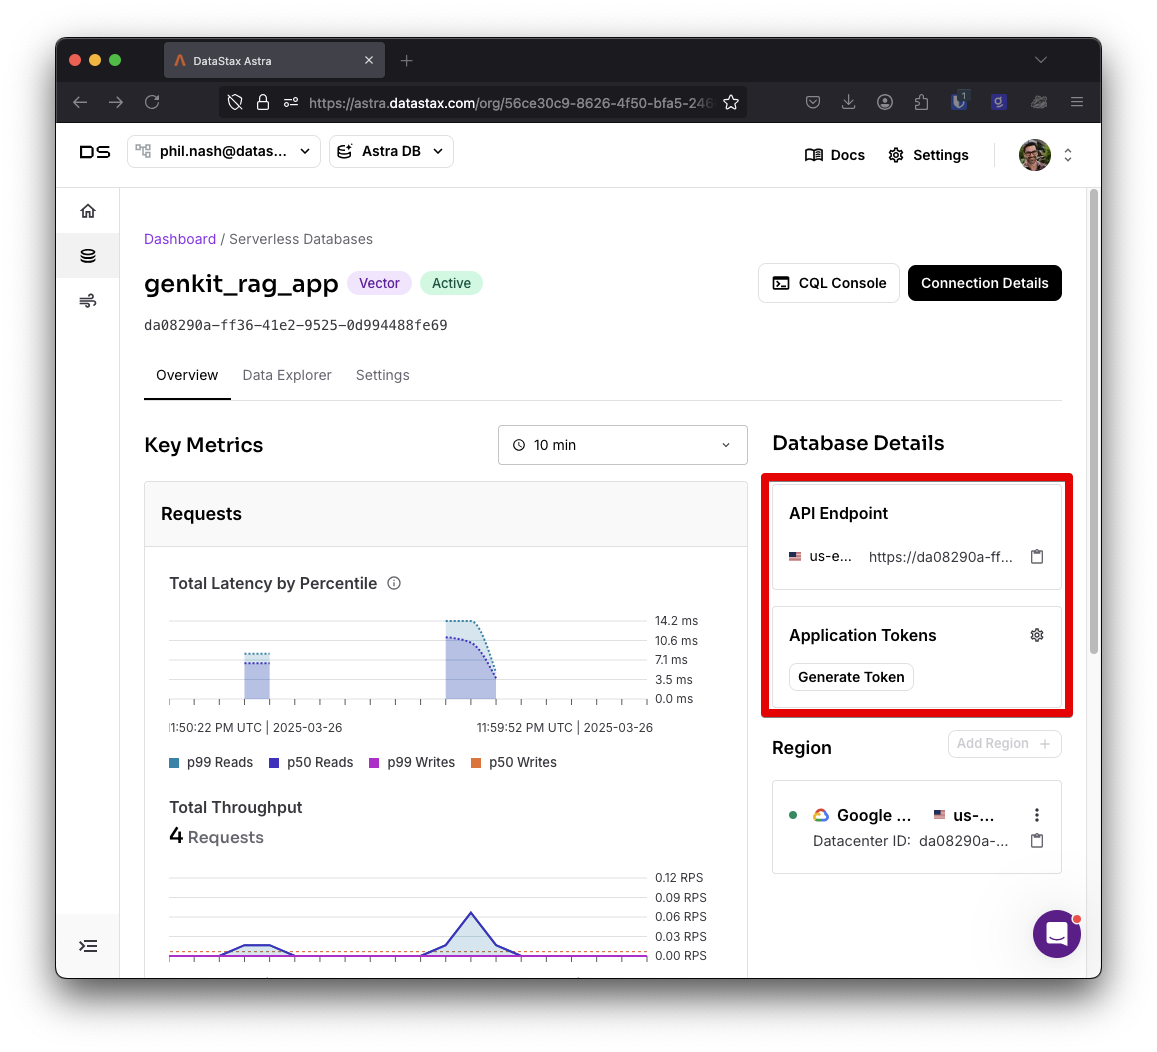
With those, create a .env file in your application and enter the credentials:
ASTRA_DB_API_ENDPOINT=""
ASTRA_DB_APPLICATION_TOKEN=""
ASTRA_DB_COLLECTION_NAME=""
Also in the .env file, enter your API key from AI Studio too:
GEMINI_API_KEY=""Now we can configure Genkit. In index.ts create the ai object like so:
const collectionName = process.env.ASTRA_DB_COLLECTION_NAME!

const ai = genkit({
  plugins: [
    googleAI(),
    astraDB([
      {
        clientParams: {
          applicationToken: process.env.ASTRA_DB_APPLICATION_TOKEN!,
          apiEndpoint: process.env.ASTRA_DB_API_ENDPOINT!,
        },
        collectionName: collectionName,
        embedder: textEmbedding004,
      },
    ]),
  ],
});
This sets up Genkit with the Google AI plugin for models and embeddings and the Astra DB plugin, configured with the credentials to access the collection you just created and the vector embedding model text-embedding-004.
We can now access the Astra DB indexer and retriever via the reference functions:
export const astraDBIndexer = astraDBIndexerRef({ collectionName });
export const astraDBRetriever = astraDBRetrieverRef({ collectionName });
The indexer is used to store documents in the collection and the retriever is used to perform vector search to return documents from the collection.
Ingesting data
Now we can ingest some data into Astra DB. For this RAG application, let's grab data from the web. To ingest web data, we'll need to fetch it from a URL and then extract the main content from the returned HTML. I've written before about how I like to use Readability.js to parse out the content from a page, so we'll follow that. We'll also need something to turn the content into chunks, let's use llm-chunk for this as it's relatively simple.
Install the dependencies:
npm install @mozilla/readability jsdom llm-chunk
Import them at the top of the script:
import { Readability } from "@mozilla/readability";
import { JSDOM } from "jsdom";
import { chunk } from "llm-chunk";
Write a function that takes a URL, fetches the HTML content, extracts the content and returns it.
async function fetchTextFromWeb(url: string) {
  const html = await fetch(url).then((res) => res.text());
  const doc = new JSDOM(html, { url });
  const reader = new Readability(doc.window.document);
  const article = reader.parse();
  return article?.textContent || "";
}
The next thing to do is write our first Genkit flow to ingest data from a URL into the collection. Flows are functions that you can run via the Genkit UI or through code. Flows have strongly defined input and output schemas using zod.
For this flow we'll accept a string which is a URL. There's no need for an output as the function will just end when it completes successfully.
export const indexWebPage = ai.defineFlow(
  {
    name: "indexPage",
    inputSchema: z.string().url().describe("URL"),
    outputSchema: z.void(),
  },
  async (url: string) => {
    const text = await ai.run("extract-text", () => fetchTextFromWeb(url));

    const chunks = await ai.run("chunk-it", async () =>
      chunk(text, { minLength: 128, maxLength: 1024, overlap: 128 })
    );

    const documents = chunks.map((text) => {
      return Document.fromText(text, { url });
    });

    return await ai.index({
      indexer: astraDBIndexer,
      documents,
    });
  }
);
The ingestion pipeline is nice and easy to read as a flow. And using ai.run around the non-Genkit functions provides an extra level of tracing that we'll be able to see later.
The Genkit UI
This seems like a good time to test out what we've built so far. Open package.json and add a script to run your application code and one to start the Genkit server.
"scripts": {
"start": "tsx --env-file .env ./index.ts",
"genkit": "genkit start -- npm start"
  },
Now you can run `npm run genkit` and open the Genkit UI in your browser at localhost:4000. You can either find your flow on the dashboard or by clicking on Flows in the sidebar and then selecting it from the list.
This gives you a box to add some input. The input is the schema that we set up as the parameters to the flow. In this case, it just expects a string that’s a URL.
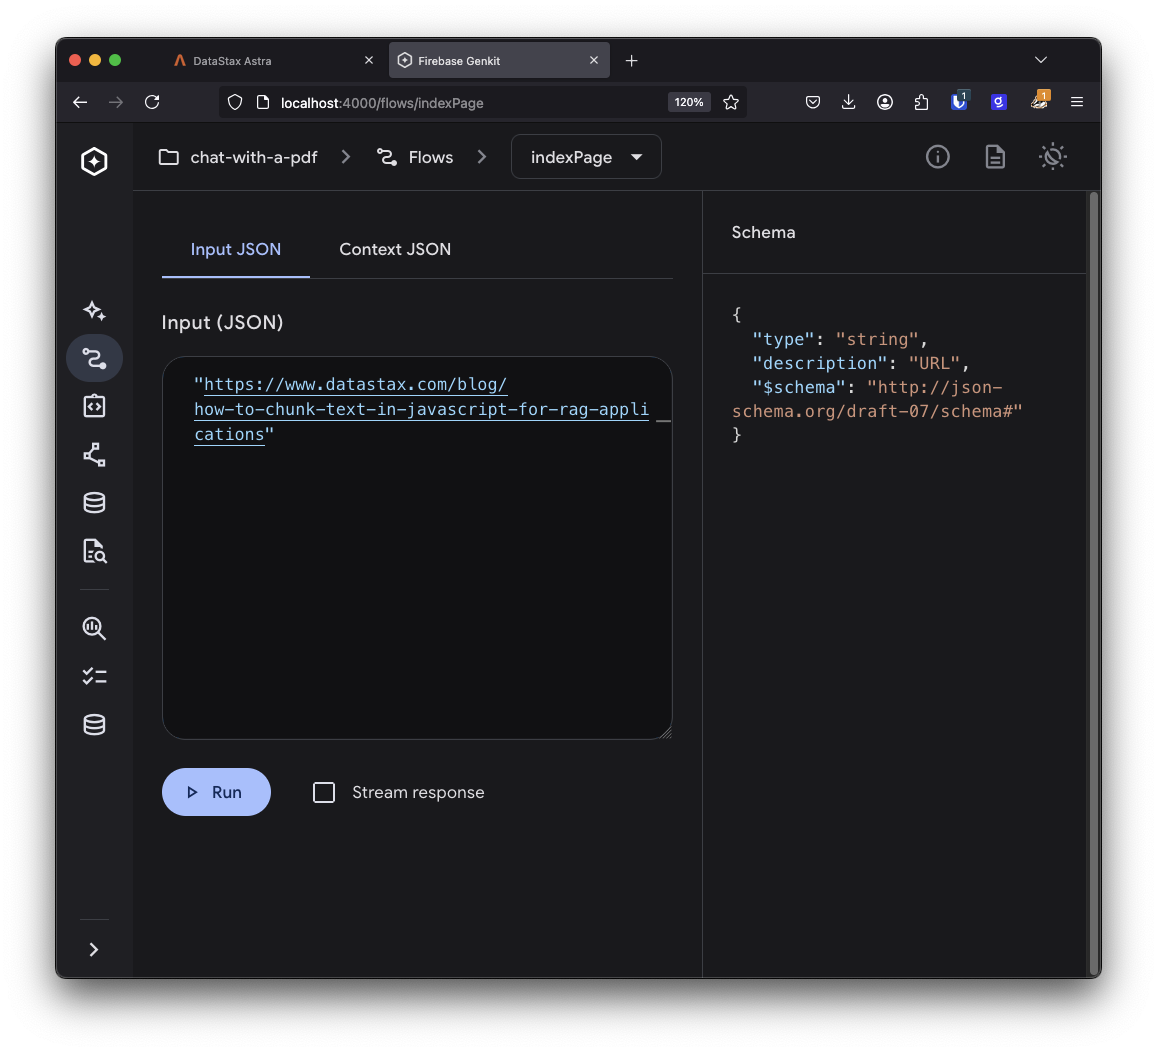 Enter a URL and run the flow. Once it's complete, you can open the DataStax dashboard and see the chunks and their vectors stored in the collection.
Back in the Genkit UI you can click on View trace and you’ll be shown each of the steps the flow took to fetch, chunk, embed and store the data.
Head back to the Genkit dashboard and open Retrievers from the sidebar. All we did to define the available retriever was set up the Astra DB plugin and export the astraDBRetrieverRef.
We can already use that retriever from the Genkit UI. Click on the retriever and enter the following in the input:
{
    "content": [
        {
            "text": "some search term"
        }
    ],
    "metadata": {}
}
In the options, change the property k to 5. Run the retriever and it will perform a vector search using the text you provide in the input and returning five results from the database.
We can now hook this up with a full RAG flow, in which we first retrieve context from the database and then pass it to a model to generate a response. Open the code again and define another flow:
export const ragFlow = ai.defineFlow(
{ name: "rag", inputSchema: z.string(), outputSchema: z.string() },
async (input: string) => {
const docs = await ai.retrieve({
retriever: astraDBRetriever,
query: input,
options: { k: 3 },
});
const { text } = await ai.generate({
model: gemini20Flash,
prompt: `
You are a helpful AI assistant that can answer questions.
Use only the context provided to answer the question.
If you don't know, do not make up an answer.
Question: ${input}`,
docs,
});
return text;
}
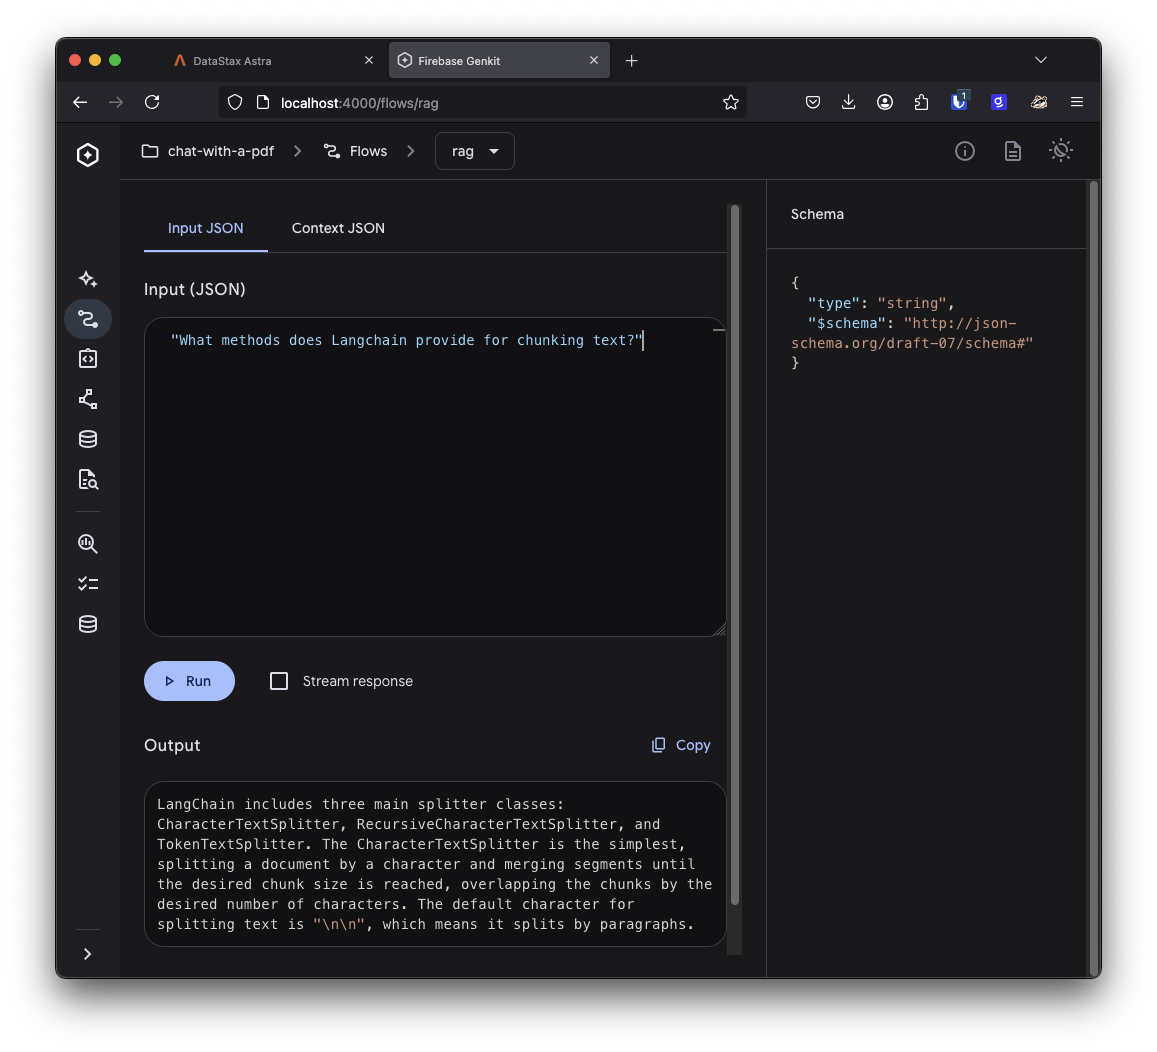
);Here we use the retriever to search for the string input, and then pass the resulting documents as part of a prompt to the generate function that uses the Gemini Flash 2.0 model to perform the generation.
Restart the Genkit server, open up the Flows section and choose your RAG flow. You can now input a question, make sure it's relevant to the data you indexed, and Gemini will generate a relevant response based on the docs.
Once again, you can hit the View trace button to see what happened at each stage in this request.
We've only used these flows in the Genkit interface so far, but for either of the flows, you can run them like:
await indexWebPage.run("URL");Genkit and Astra DB make RAG easy
It took us fewer than 100 lines of code to build the two major flows required for RAG: ingestion and generation. Firebase Genkit made it easy to test our implementation as we went—without us having to build a UI for it. And the tracing in Genkit means it's easier to track down bugs in your flows.
Astra DB is an easy to use and powerful vector database, and it's even easier to use when all you need to do is configure the plugin in Genkit and reference indexers and retrievers.
You can find the code for this app on GitHub. The Astra DB plugin for Genkit is open source so if you have any issues or requests, please open an issue on the GitHub repo. And check out the Genkit docs for more on what you can build with Genkit.
Frequently Asked Questions (FAQ)
What is Astra DB?
Astra DB is a cloud-based NoSQL document store. It features an accurate and performant vector index for storing vectors which can be used for similarity searches. It comes with a Genkit plugin for integration with the Firebase Genkit framework.
What is Genkit?
Genkit is a framework for building generative AI applications. It provides essential tools such as models, prompts, indexers, retrievers, flows, traces, and evaluations. By using Genkit, developers can efficiently create applications that leverage the power of generative AI.
How do I get started with building a RAG application using Genkit and Astra DB?
To build a RAG application with Genkit and Astra DB, you need to create a database and collection within Astra DB and then install Genkit and related dependencies into your Node.js application. Once you've configured Genkit with your Astra DB credentials, you can start creating flows.
What does building the RAG application involve?
Building the RAG application involves creating a collection in Astra DB to store vectors, and setting up flows in Genkit to ingest data, and to generate responses based on context retrieved from the database. You can test these flows out using the Genkit UI.