Want to take a tour of several quick ways to get started with DataStax Enterprise? Well, this is your guide!
In this article I've written up a whirlwind tour of the Google Cloud Platform Marketplace and Azure Marketplace options for DataStax Enterprise. Both of these solutions can get a cluster built in short order across multiple regions with plenty of performance power and resiliency. I then step through resources and steps to get started with a Docker deployed solution locally for testing and development. But the end of this article you'll be ready to get going quickly with DataStax Enterprise through a number of quick deployment options.
I joined DataStax a few months ago. During the first few weeks I wanted to get a few clusters up and running as soon as I could possibly get them put together. Before even diving into development I needed to have some clusters built up. The Docker image is great for some simple local development and I'll talk about that further into this article, but first I wanted to have some live 3+ node clusters to work with. The specific deployed and configured use cases I had included:
- I wanted to have a DataStax Enterprise 6 Cluster up and running ASAP.
- I wanted to have an easy to use cluster setup for Cassandra – just the OSS deployment – possibly coded and configured for deployment with Terraform and related scripts necessary to get a 3 node cluster up and running in Google Cloud Platform, Azure, or AWS. This I'll also cover in a future blog entry.
- I wanted a DataStax Enterprise 6 enabled deployment, that would showcase some of the excellent tooling DataStax has built around the database itself, such as the Lifecycle Manager, OpsCenter, and related tools.
I immediately set out to build solutions for these three requirements.
The first cluster system I decided to aim for was figuring out a way to get some reasonably priced hardware to actually build a physical cluster. Something that would make it absurdly easy to just have something to work with anytime I want without incurring additional expenses. Kind of the ultimate local development environment. With that I began scouring the interwebs and checking out where or how I could get some boxes to build this cluster with. I also reached out to a few people to see if I could be gifted some boxes from Dell or another manufacturer.
I lucked out and found some cheap boxes someone was willing to send over my way for almost nothing. But in the meantime since shipping will take a week or two. I began scouring the easy to get started options on AWS, Google Cloud Platform, and Azure.
First Cluster Launch on GCP
Ok, so even though I aim to have the hardware systems launched for a local dev cluster, I was on this search to find the most immediate way to get up and running without waiting. I wanted a cluster now, with a baseline setup that I could work with.
I opened up my Google Cloud Platform account to check out what options there are. The first option I found that is wildly easy to get started with involved navigating to the Cloud Launcher, typing in Cassandra, choosing the DataStax Enterprise option and then clicking on Cloud Launcher. Note that if you do go this route it can get into the $300 or higher range very quickly depending on the selections chosen.
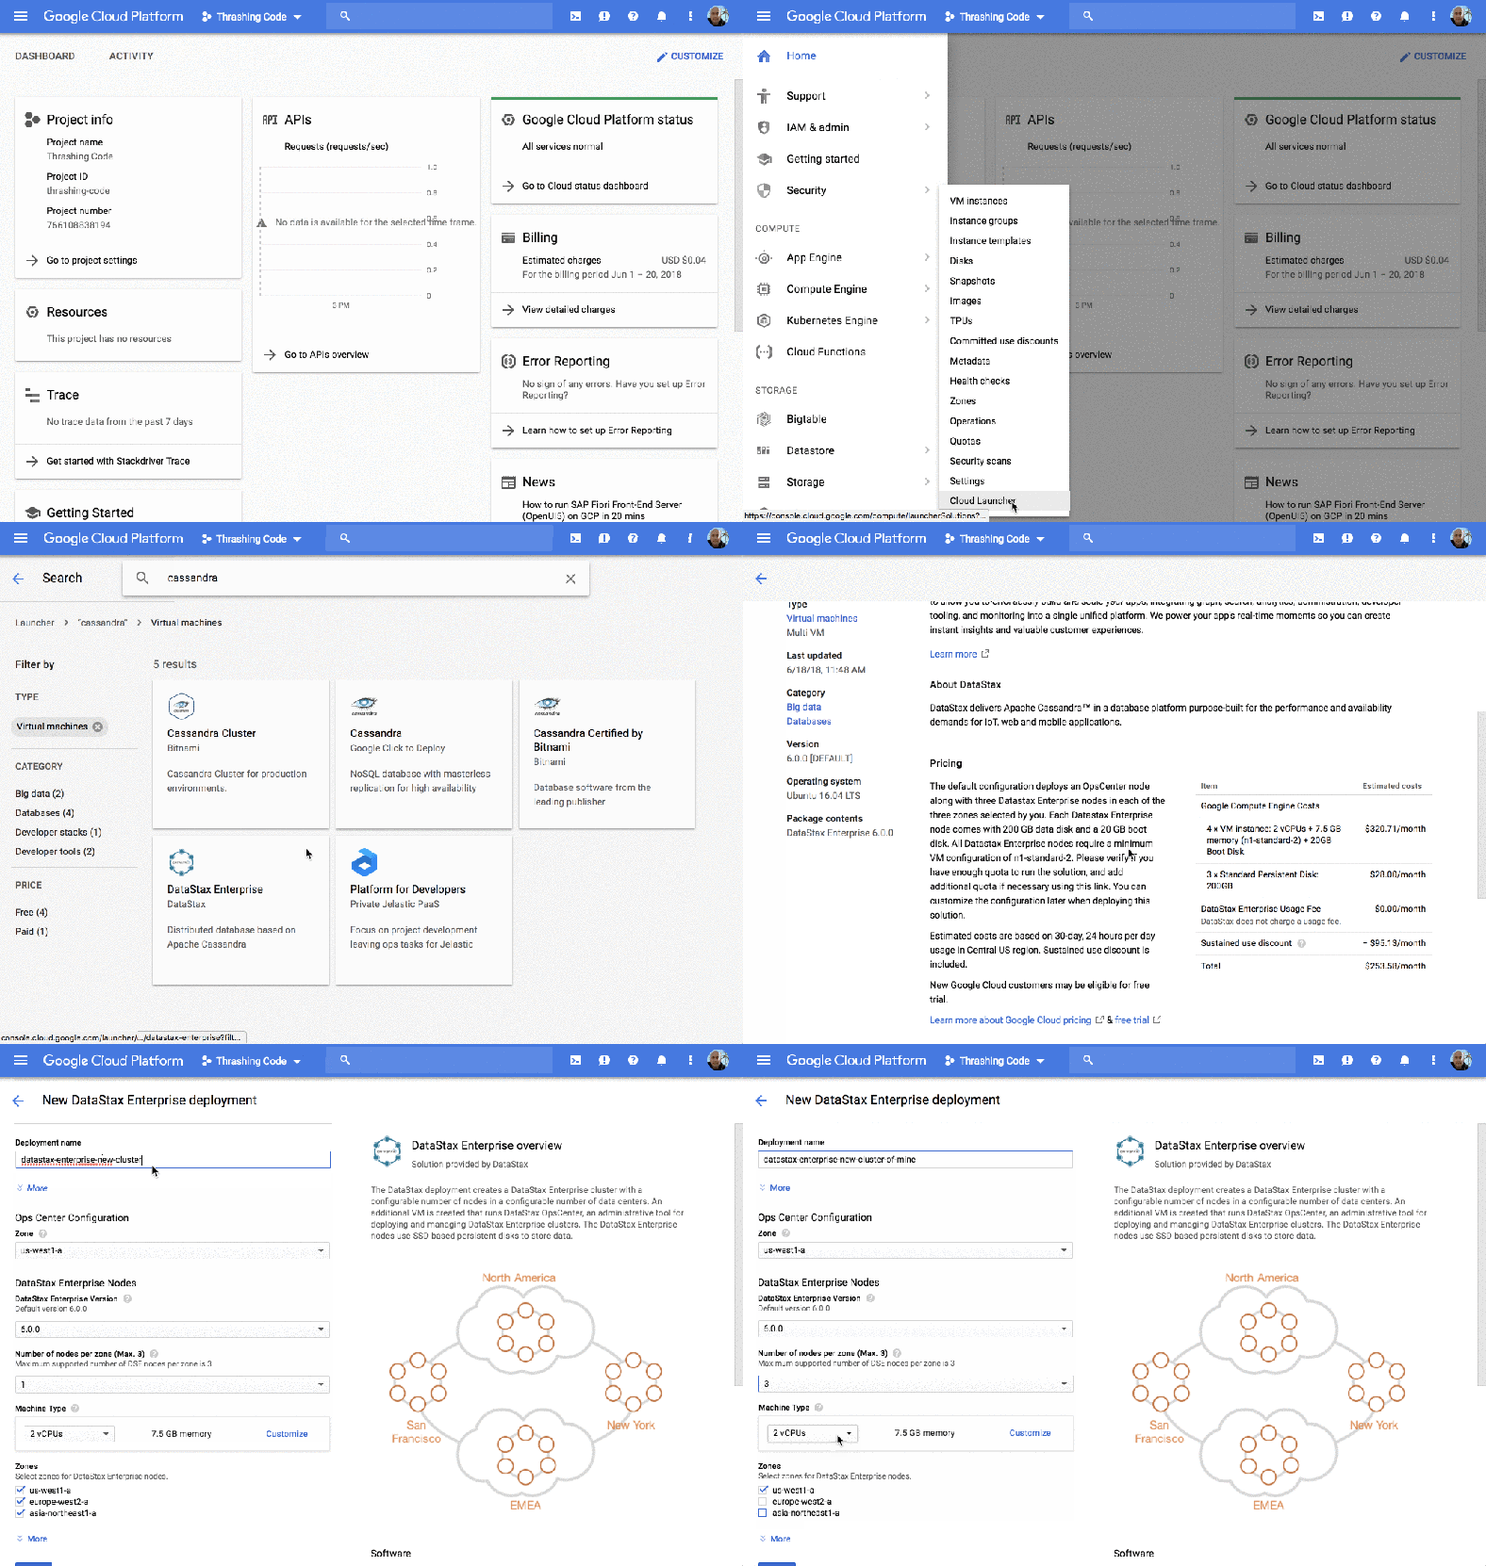
After clicking on create, the process begins building the cluster.
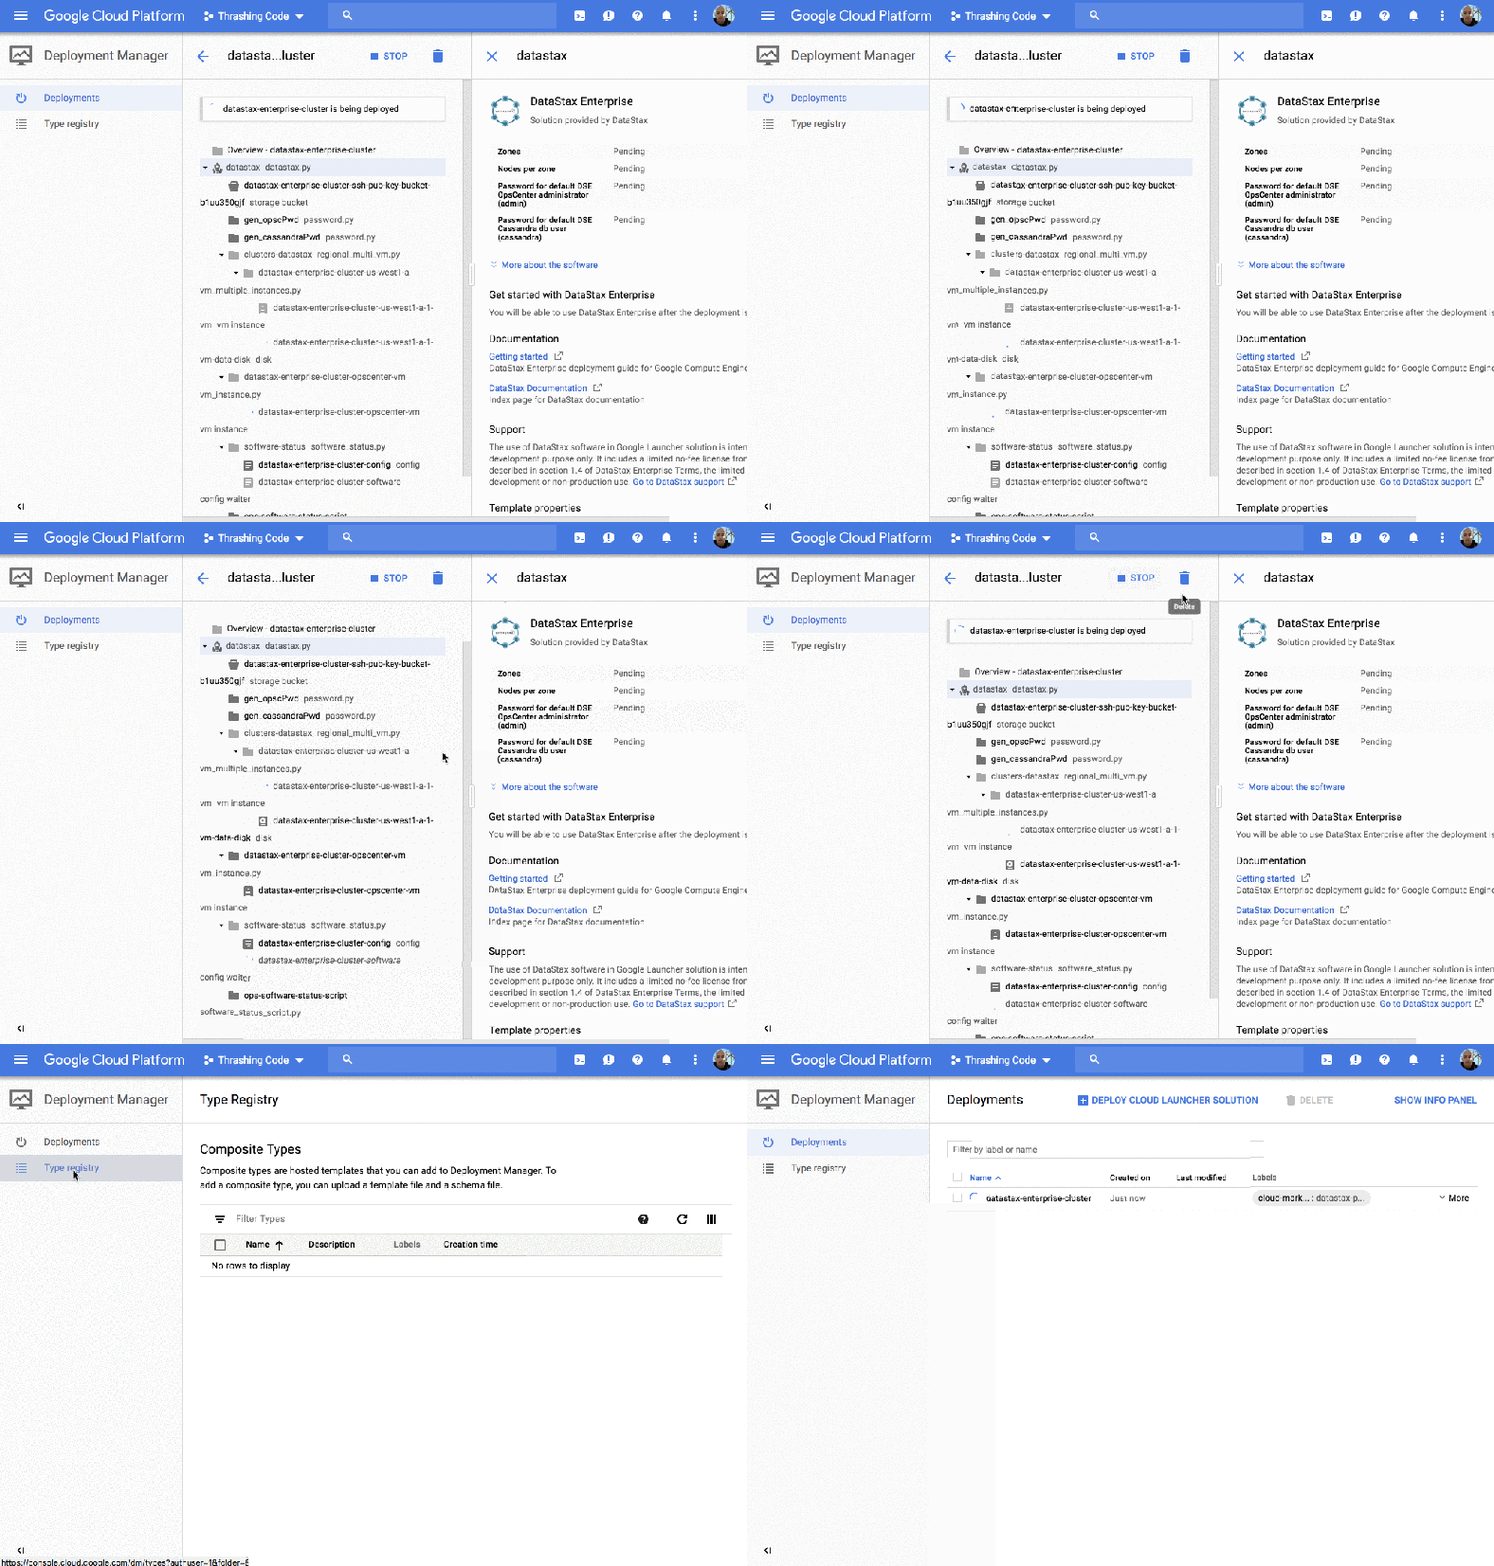
Then generally after a few minutes you have the cluster up and running. If you’ve left the check boxes for the regions available, it’s a multi-region cluster, and if you’ve selected multiple nodes per cluster that gives you a multi-cluster, multi-region deployment. Pretty sweet initial setup for just a few minutes and a few clicks.
Second Cluster Launch on Azure
I wanted to check out what the marketplace offered in Azure too, so I opened up the interface and did a quick search for the marketplace. It’s up yonder in the top of the interface on the … not the console, but here.

Next we have to fill out a bunch of info per our business. In this case I just used the ole’ Thrashing Code for this particular deployment. This is the first create of the process.
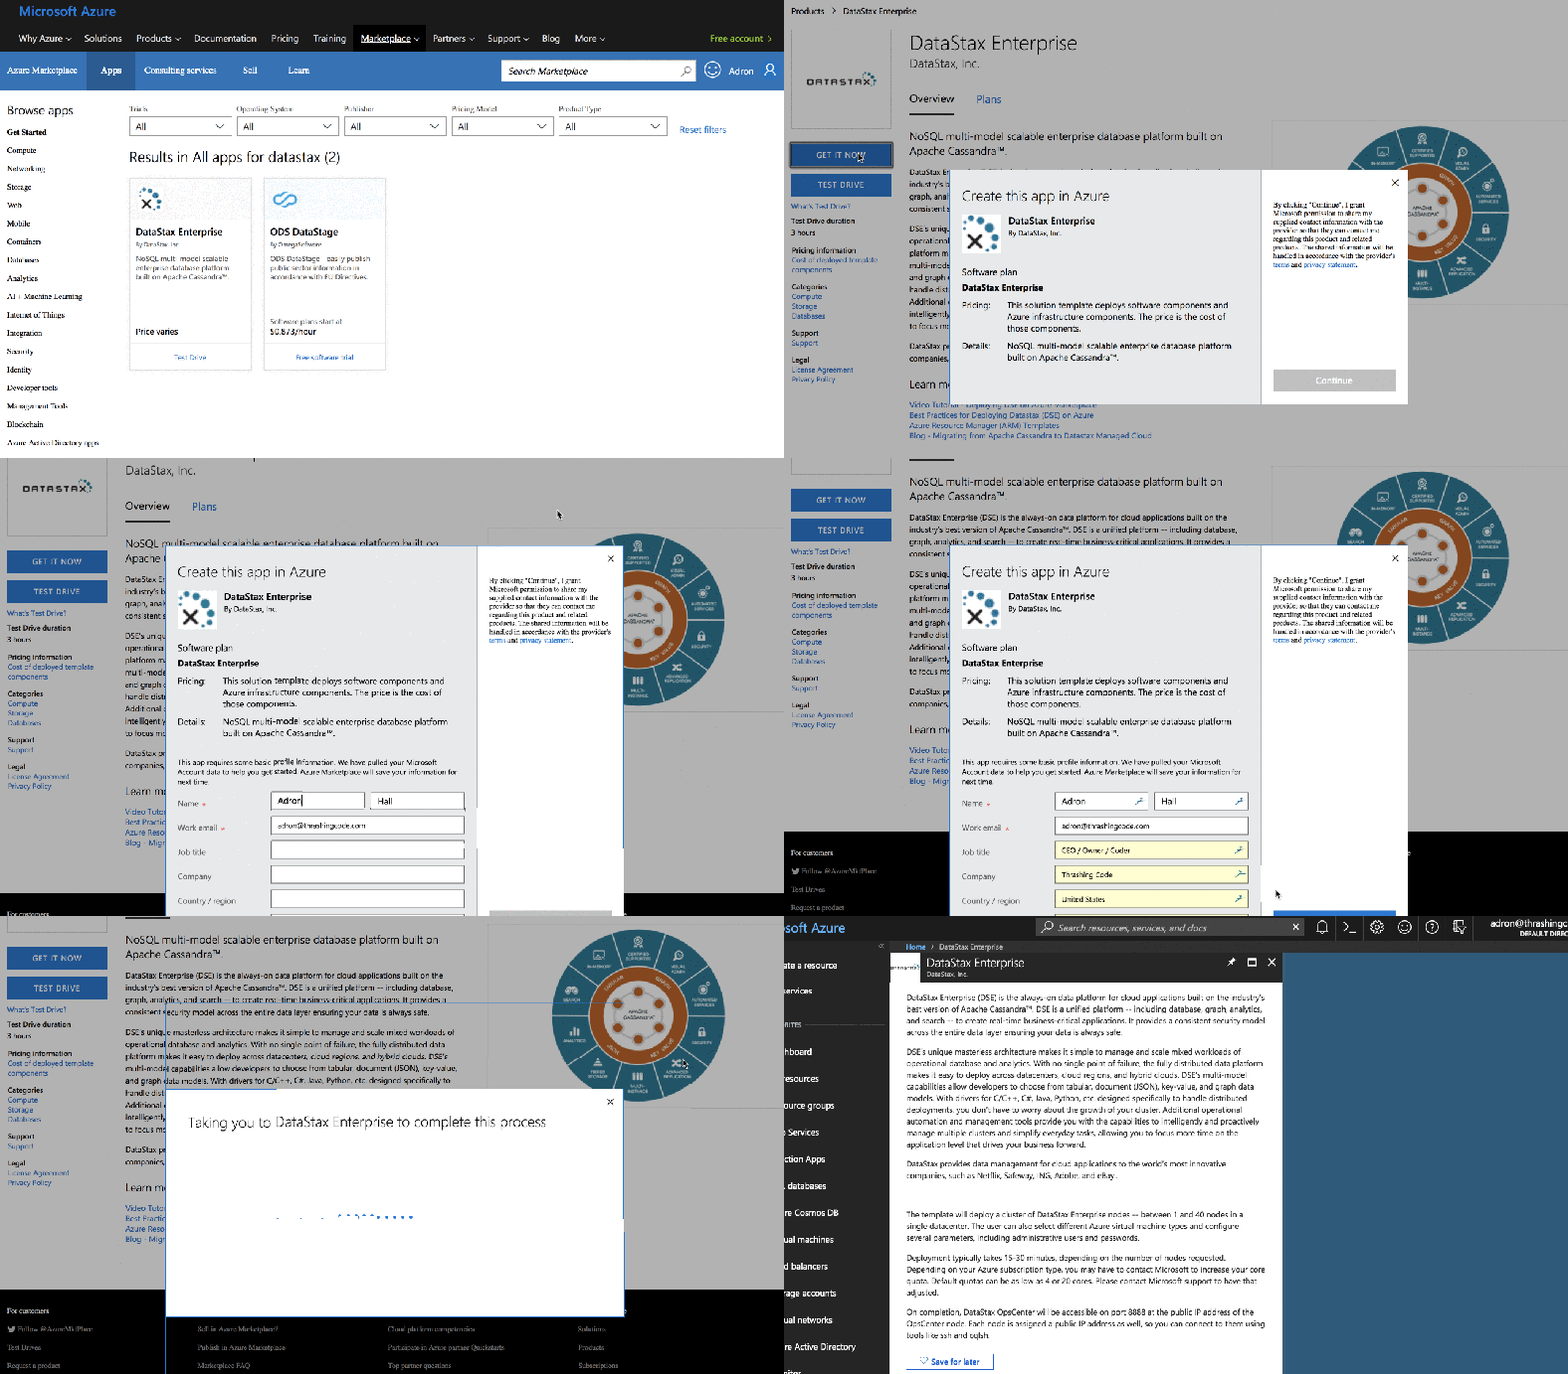
Then roll into that after it does the cross-auth of identity. Click create (this is the second create), and then some additional information around the C* auth password, admin username and password, and then choose the subscription model, name of cluster, and region.
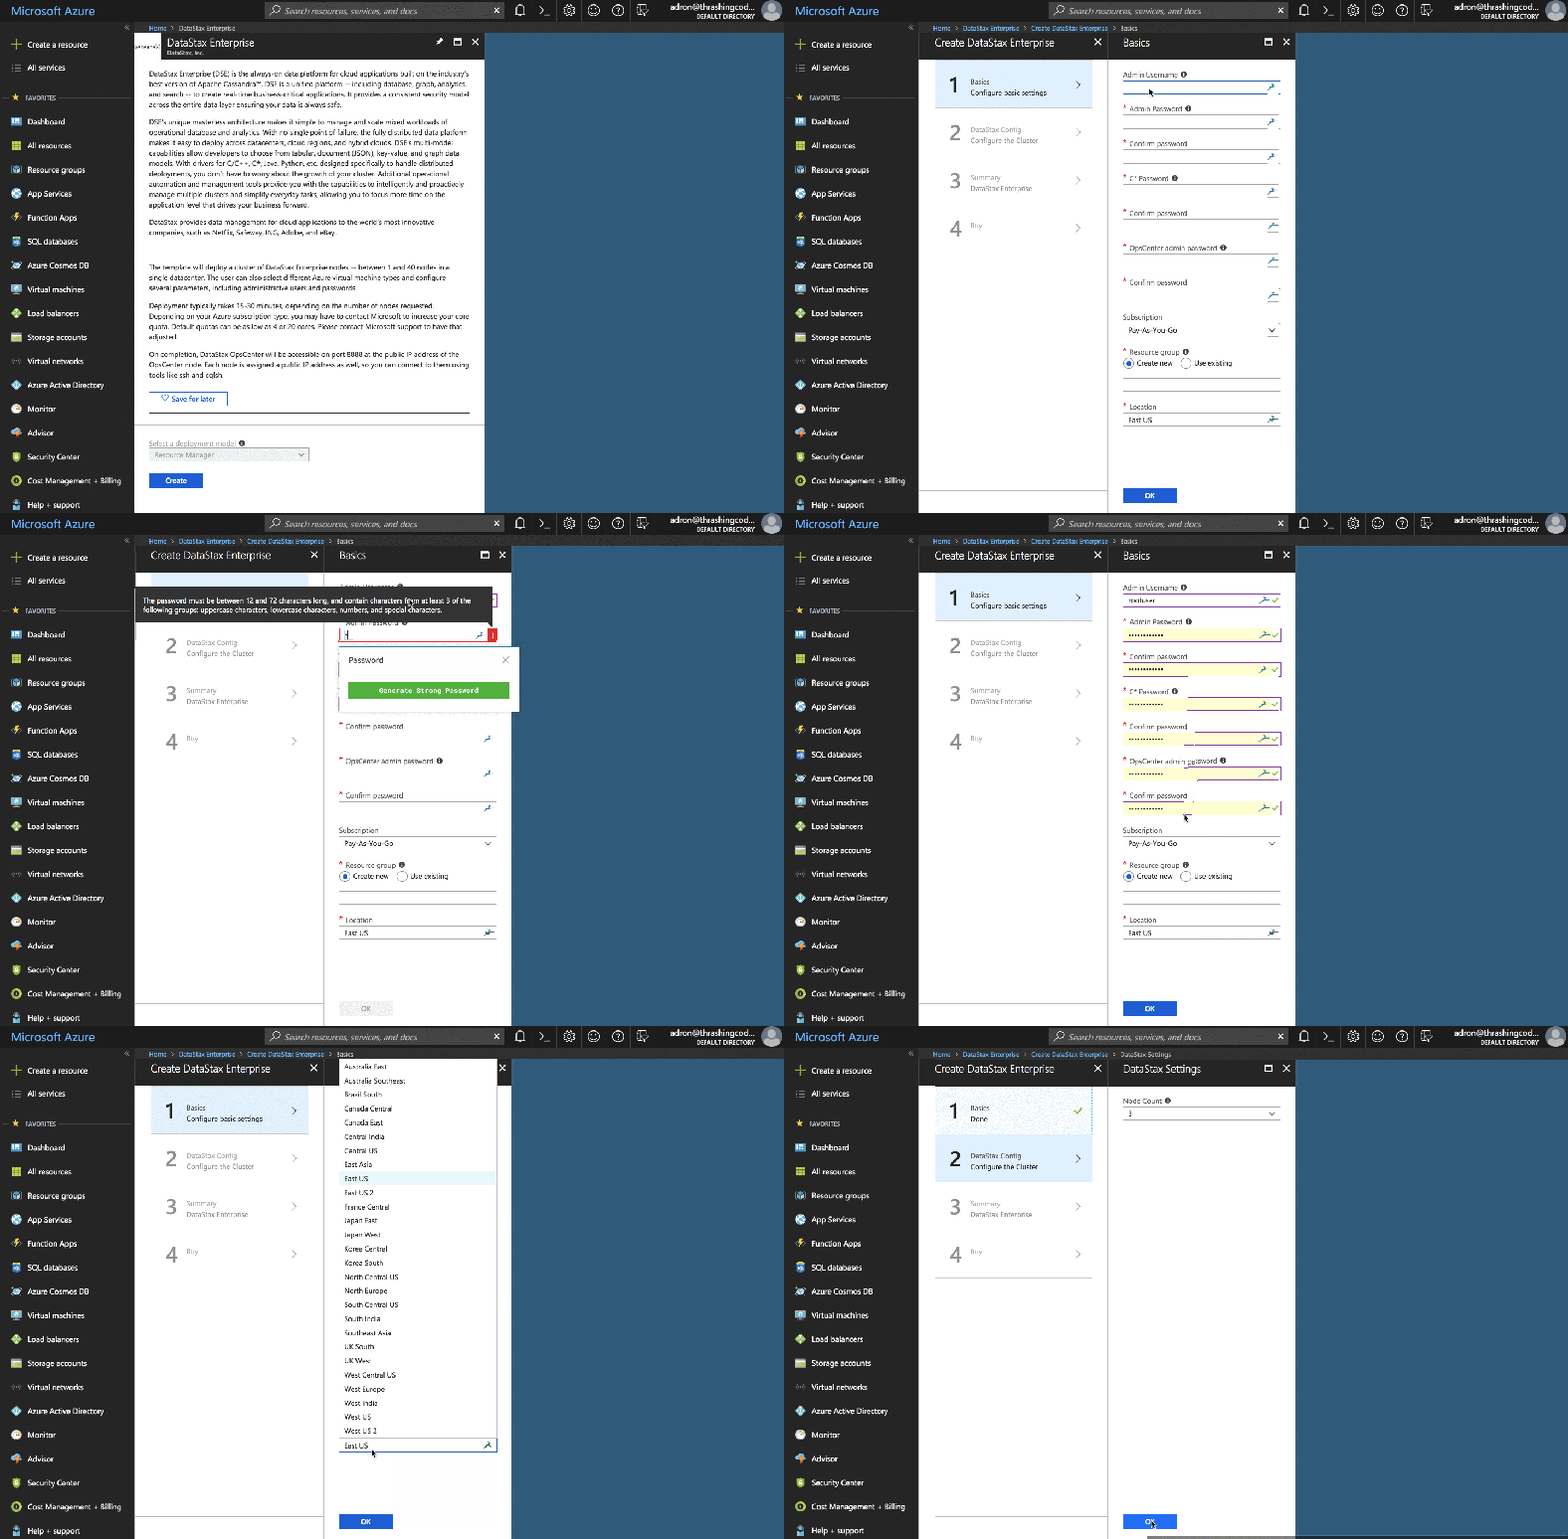
After all that the cluster will be up and running. Now, I could get into adding another cloud option with AWS but I’ll leave that for another day. I’ve already got two cloud providers up and running so I’ll just stick to working with those for now. After all, two clouds makes a multi-cloud offering right!
Another way to get up and running with a DataStax Enterprise 6 setup on your local machine is to use the available (and supported by DataStax) Docker images. For additional description of what each of the images is, what is contained on the images, I read up on via Kathryn Erickson’s (@012345) blog entry “DataStax Now Offering Docker Images for Development“. Also there’s a video Jeff Carpenter (@jscarp) put together which talks from the 5.x version of the release (since v6 wasn’t released at the time).
I’m adding some lagniappe to that material here and providing additional notes to things. Before continuing however it’s a good idea to read Kathryn’s blog entry and watch Jeff’s video real quick, I promise it’ll only take you minutes of time, so do that and then come back. My post will still be here.
The three images that are available include:
The easiest way to get started with these images since they inter-operate together, and the dse-server image can be used to make a cluster, is to use docker-compose to spin them up. First though, I’ll need to actually pull the images down from the Docker Hub.
docker pull datastax/dse-studio

docker pull datastax/dse-opscenter

docker pull datastax/dse-server
Now that we have the images, there are some docker-compose yaml files available in the DataStax Github Repo here that make it a single command line run to get an environment going locally. Various setups are available on a single machine depending on what you need too. Before running anything though, here are the yaml files with some extra descriptions about what’s going on with each.
This is the file for a server node. The image is datastax/dse-server which is available locally since I ran the commands listed earlier in the post. There’s a DS_LICENSE that is set to accept, ulimits memlock is set to -1, sets environment variables for DS_LICENSE and SEEDS, and some other settings specific to allowing mlock to lock memory. All kind of self-explanatory for each section of the yaml below.
version: '2'

services:
seed_node: image: "datastax/dse-server" environment: - DS_LICENSE=accept # Allow DSE to lock memory with mlock cap_add: - IPC_LOCK ulimits: memlock: -1 node: image: "datastax/dse-server" environment: - DS_LICENSE=accept - SEEDS=seed_node links: - seed_node # Allow DSE to lock memory with mlock cap_add: - IPC_LOCK ulimits: memlock: -1
This is the studio file contents, which opens up a mapping for port 9091, sets the environment setting for the DS_LICENSE variable, and that’s really it. The image already has DSE Studio installed and ready to run as soon as the image is used to spin up a container.
version: '2'

services:
studio: image: "datastax/dse-studio" environment: - DS_LICENSE=accept ports: - 9091:9091
The last file is the Ops Center startup. Also has pretty minimal contents since the image is setup and installed with what it needs to get up and running quickly. A port is also mapped to 8888 for use, and seed_node is bound appropriately with the other containers.
version: '2'

services:
opscenter: image: "datastax/dse-opscenter" ports: - 8888:8888 environment: - DS_LICENSE=accept seed_node: links: - opscenter node: links: - opscenter
To get these started in various executions, for instance, I’ll start with a 3-node cluster, Ops Center running, and DSE Studio.
docker-compose -f docker-compose.yml -f

docker-compose.opscenter.yml -f docker-

compose.studio.yml up -d --scale node=2
Breaking that apart, this is a command using docker-compose that uses all three of the yaml files shown above. I start with docker-compose then follow that by pointing to a file with the -f switch and then the file itself, docker-compose.yml. The next with another -f docker-composie.opscenter.yml, then the last -f docker-compose.studio.yml and the sub command up. Then follow this with -dso that the containers are run in a detached state. Follow that with --scale node-2 which will give us the starting node count of two nodes for the server.
With that command, one can then break it apart to startup different combinations to work with such as this command below which just starts up a single node and the studio. A great setup using minimal resources if we just want to work with studio.
docker-compose -f docker-compose.yml -f docker-compose.studio.yml up -d --scale node=0
Another combination might be to just startup a 3 node cluster, of course, one could try more but that will likely decimate a machines resources pretty quickly.
docker-compose -f docker-compose.yml up -d --scale node=2
If we want to play around with Ops Center a great way to do that is to spin up a 3-node cluster and opscenter by itself.
docker-compose -f docker-compose.yml -f docker-compose.opscenter.yml up -d --scale node=2
That gives us options around what to start and which things we actually want to work with at any particular time. A great way to setup a demo or just test out different features within DataStax Enterprise Ops Center, Studio, or even just setting up a cluster.
If you’d like to get involved, run into an issue, or just simply have a question or two check out the Github repo to file an issue or add a comment in Docker Hub.
- As a comment in Docker Hub
- File an issue in the GitHub repo
- Email us at techpartner@datastax.com
Summary
Some days ago I took a quick tour through Azure and GCP Marketplace options for getting a DSE6 Cassandra Cluster up and running. I’ll be taking a look at additional methods for installation, setup, and configuration in the coming weeks and days. So stay tuned, subscribe, or if you’d like to hear about new Cassandra or related distributed systems meetups in the Seattle area be sure to sign up to my Thrashing Code Newsletter (and select Event News Only if you only want to know about events).

