
Data security is a very important issue in today's world and one of the mechanisms Cassandra provides in this area is SSL encryption and authentication. In this post we will go through the simple steps needed to connect DataStax DevCenter to an SSL-enabled Cassandra cluster.
We will assume that you have Cassandra cluster with working SSL configuration.
Prerequisites:
- Install the Java Cryptography Extension (JCE) on the system where you have DevCenter installed.
- Locate your jre lib/security directory:
- On Linux it is usually at /usr/lib/jvm/jdk1.7.x.x/jre/lib/security.
- On Windows it should be by default at: C:\Program Files\Java\jre7\lib\security.
- On OSX it is at /Library/Java/JavaVirtualMachines/jdk1.x.x.x/Contents/Home/jre/lib/security.
- Download the Java Cryptography Extension (JCE)
- Extract the downloaded file and copy the content of UnlimitedJCEPolicy directory to jre/lib/security folder
- Locate your jre lib/security directory:
- You will be using the keytool command to manage keys.
- If you cannot find the keytool command on your Windows system see this link for details: "http://certificate.fyicenter.com/97_JDK_Keytool_How_to_Find_the_Java_Keytool_on_Windows.html"
Server Verification:
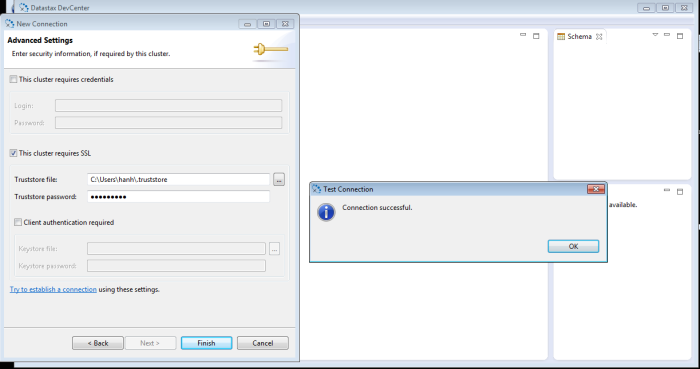
To perform server verification, the client needs to have the public key certificate of each Cassandra node stored in a local truststore file. This file is password protected (keytool will prompt to create a password). The truststore file and password will be entered into the DevCenter connection manager dialog box (see below).
- Create a truststore file on a client using server certificates
- Obtain the public key certificates from each Cassandra node you would like to connect to DevCenter
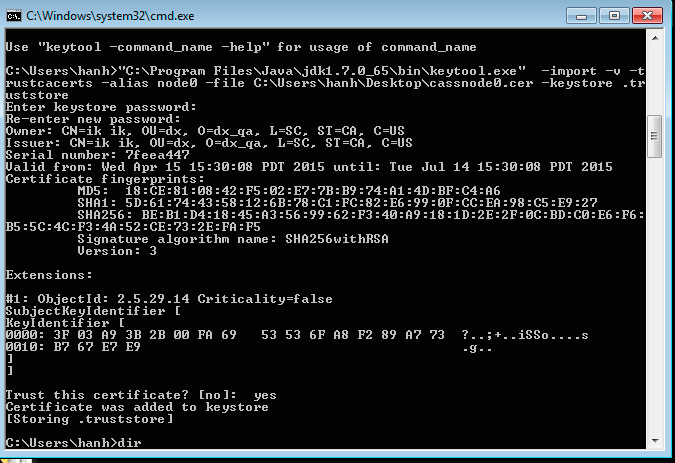
- Import these certificates into a truststore file on the client, for example:
- 1
- 2
- 3
keytool -import -v -trustcacerts -alias node0 -file node0.cer -keystore .truststore
keytool -import -v -trustcacerts -alias node1 -file node1.cer -keystore .truststore
keytool -import -v -trustcacerts -alias node2 -file node2.cer -keystore .truststore
- If you are seeing "Failed to initialize a pipeline." error, this means that you still need to install Java Cryptography Extension (JCE).
Client verification:
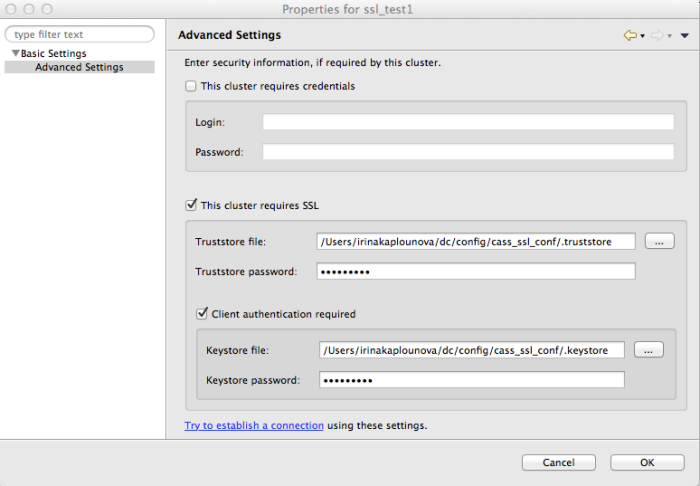
If the Cassandra cluster you are trying to connect to requires client verification, you need to perform the following additional steps:
- Create a client certificate and keystore
- Create ssl certificate for the host where DevCenter is installed, for example:
keytool -genkey -alias ikapl -keystore .keystore
keytool -export -alias ikapl -file ikapl.cer -keystore .keystore
The public certificate is stored in ikapl.cer file
keytool -import -v -trustcacerts -alias ikapl -file /tmp/ikapl.cer -keystore /var/tmp/.truststore
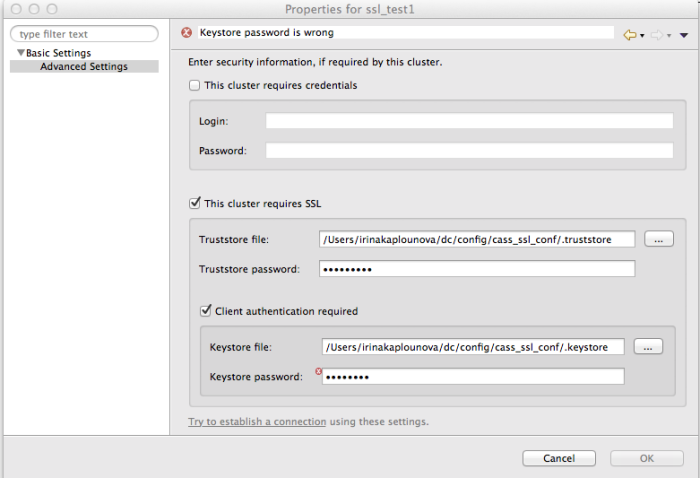
Connection manager will display an error in case the path to the file or the password is incorrect. The following screenshot shows an example error message for an invalid password:
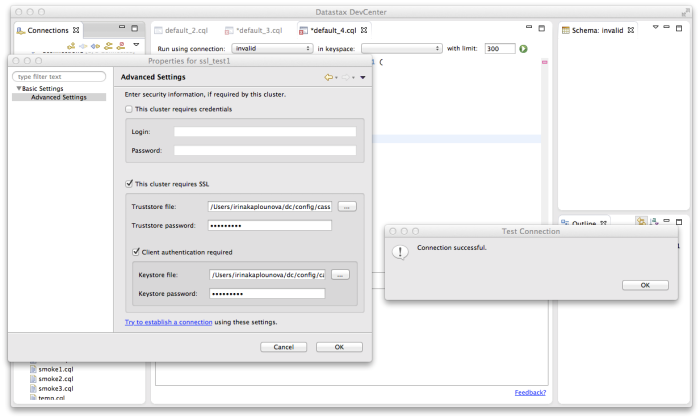
That's it! A new connection has been created. Now you can enable it and have DevCenter communicate with the SSL-enabled Cassandra cluster.
DataStax AI Platform:
The Fastest Way to Build and Deploy AI Apps
Try For FreePrerequisites:
Server Verification:
Client verification:
More Technology
View All

Moving Data between Apache Cassandra® and Astra DB