DataStax powers the Right-Now Enterprise with the always-on, distributed cloud database built on Apache Cassandra™ and designed for hybrid cloud. So let's get started.
There are several options to install DSE which are documented here. In this tutorial, I will use the Lifecycle Manager (LCM) which allows you to easily provision, configure, and install DataStax Enterprise clusters.
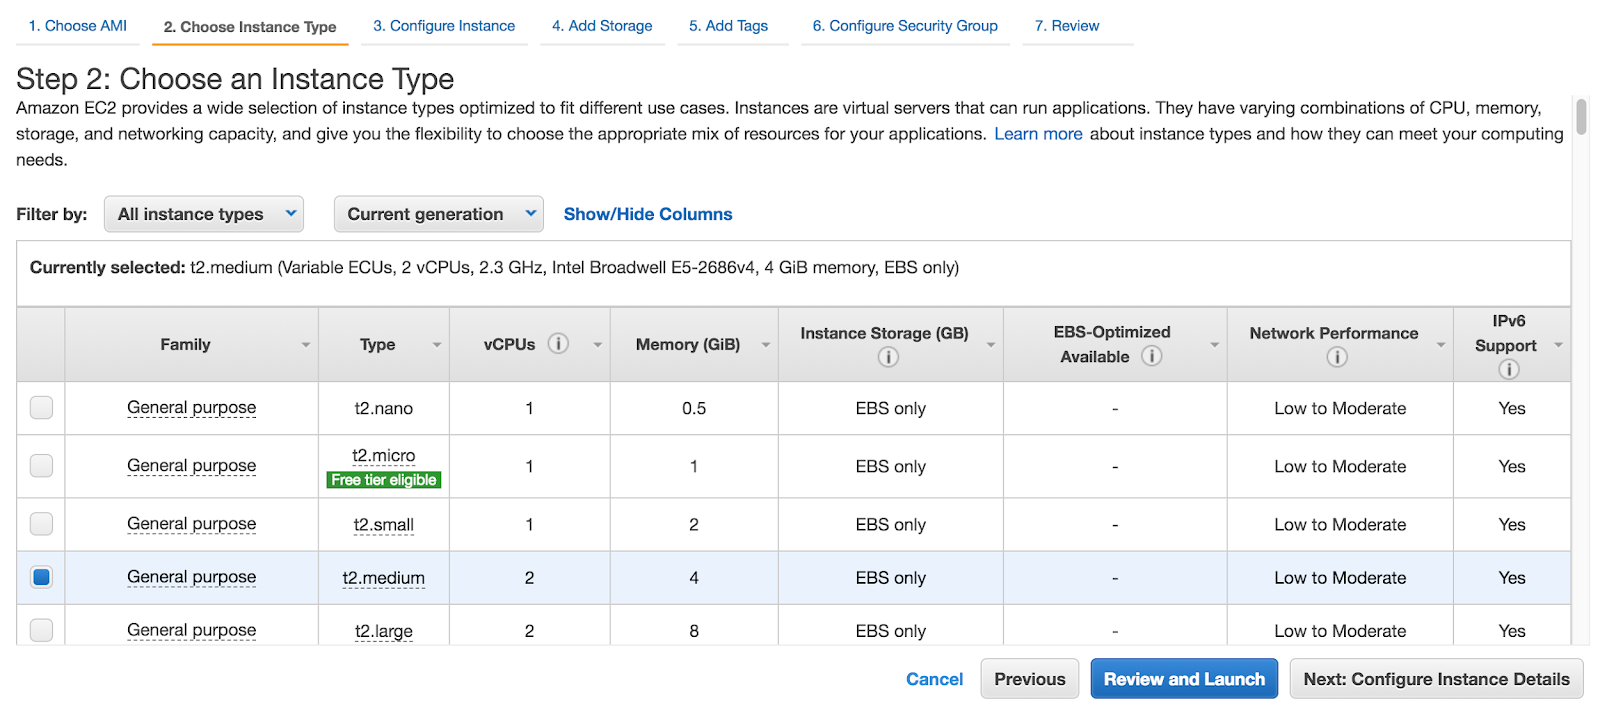
In this tutorial for simple functional testing, I have used t2.medium instance type on AWS which is sufficient.
Here are some guidelines to consider as you plan your Enterprise implementation https://docs.datastax.com/en/dse-planning/doc/planning/planningHardware.html
1.) Provision your Virtual Machine on AWS
a.) Configure Security Rules
Navigate on AWS to Services → Compute →(Click on) EC2
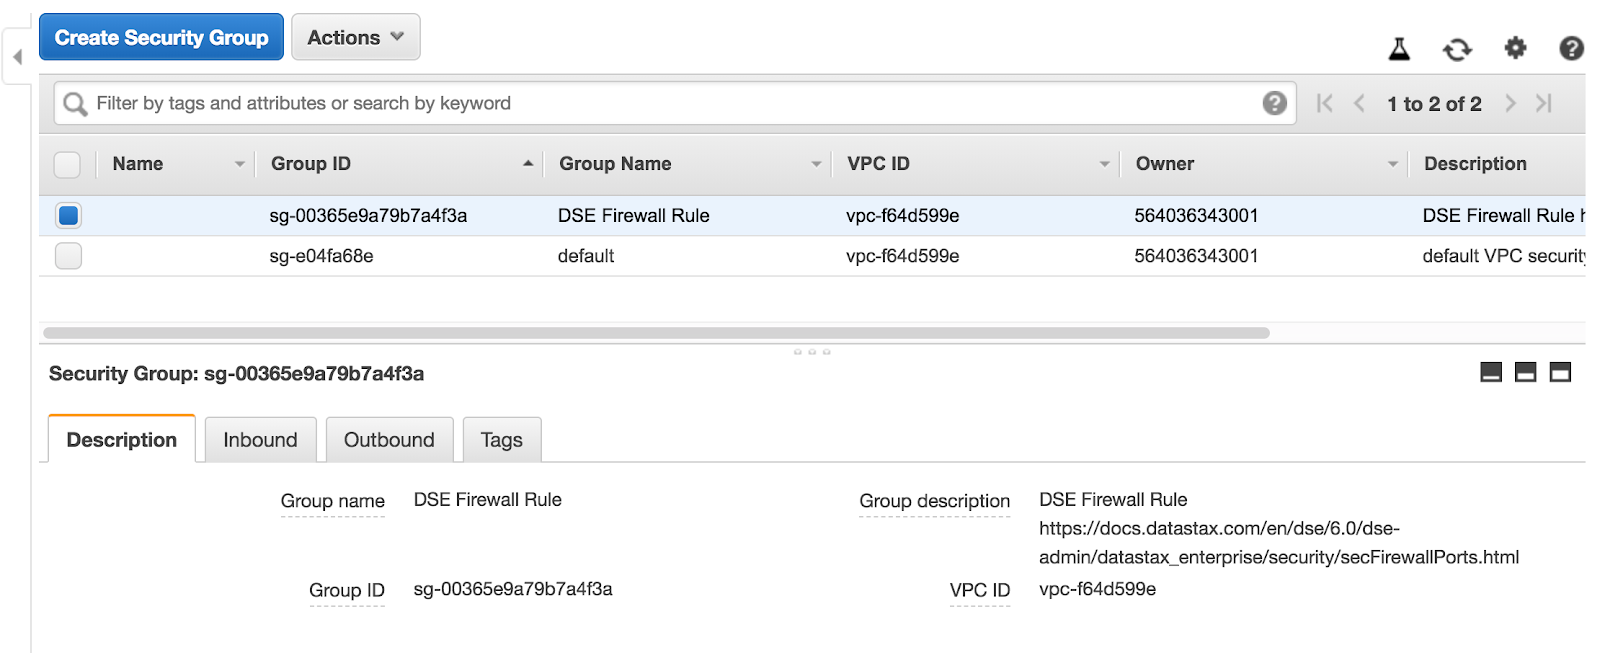
On the left-hand side, you will see Network and Security →Security Groups →(Click on) Create Security Group
I have created a new security group as highlighted below. Note the name of this security group “sg-00365e9a79b7a4f3a”. It will be used as we add the inbound rules for internode communication.
Edit the Inbound Security rules to look like below.
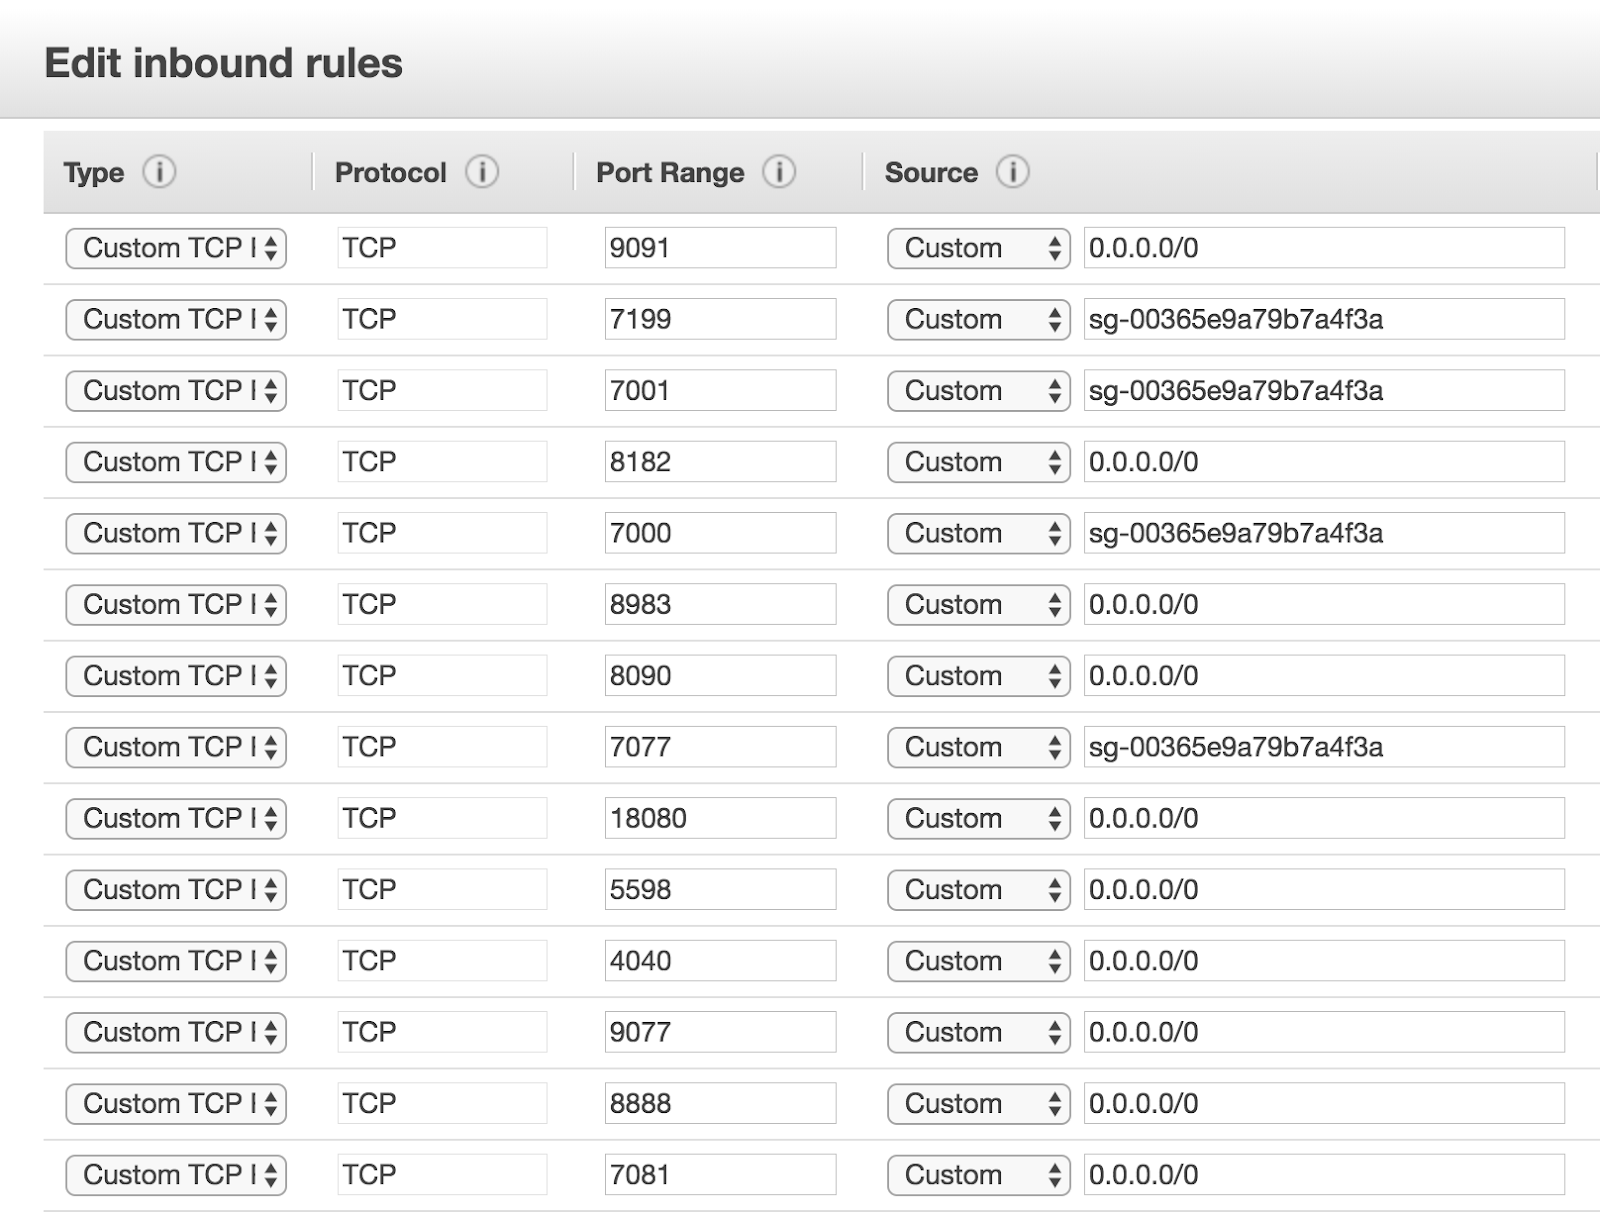
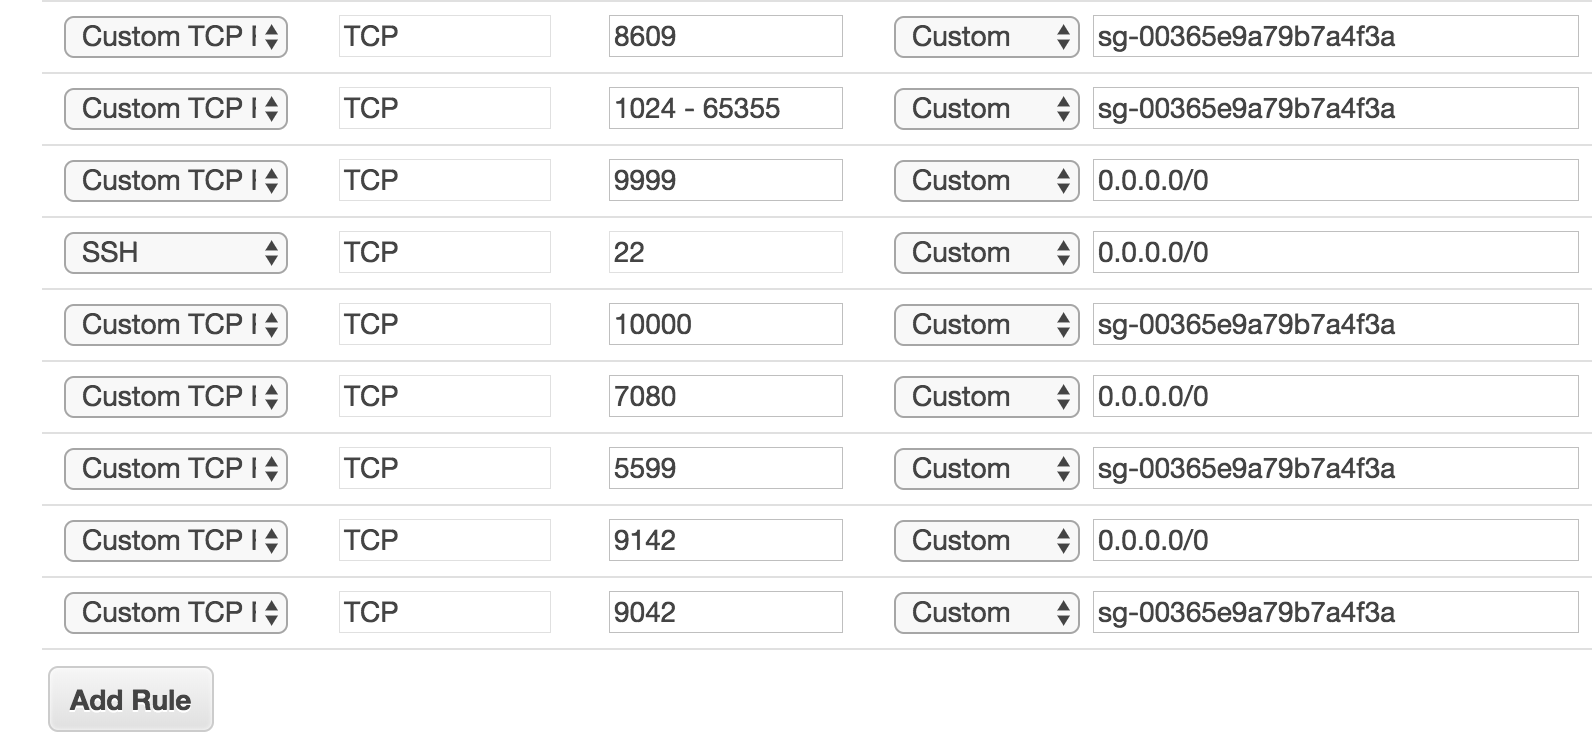
You don’t need to make any changes to the Outbound Rule.
b.) Create Virtual Machine on EC2
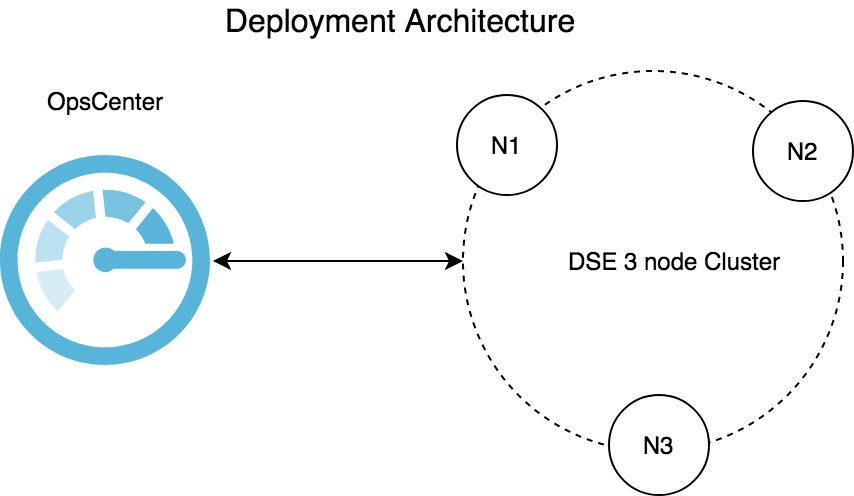
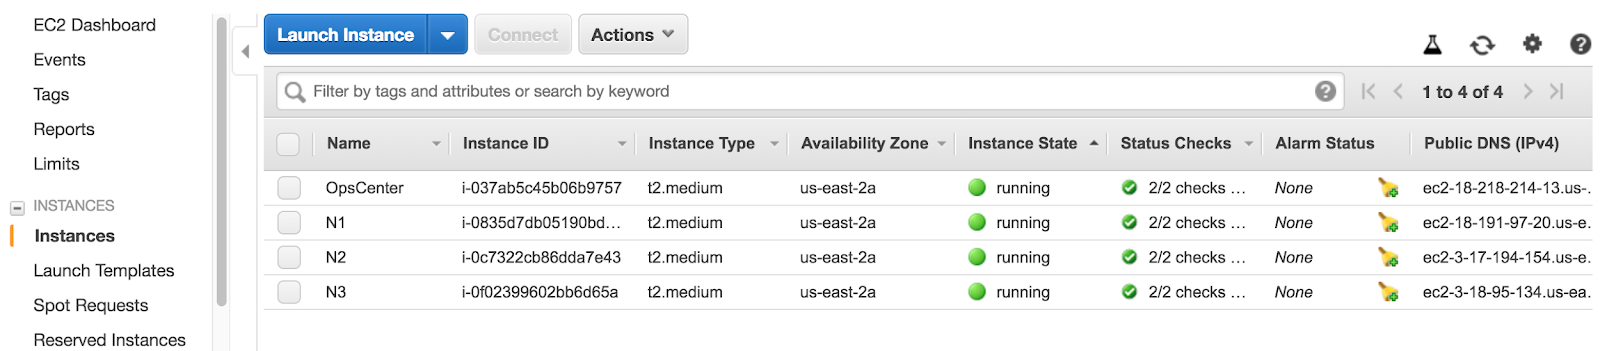
We will create 4 VM’s. One for OpsCenter and 3 for the distributed database Nodes
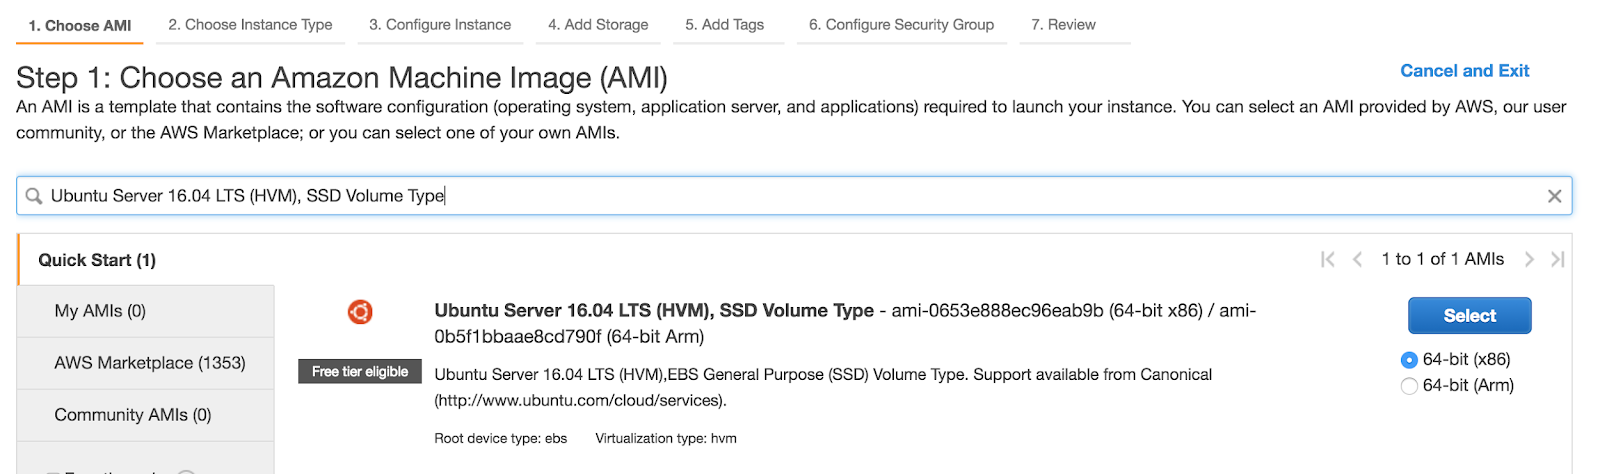
So navigate to Service → Compute → EC2 → Launch Instance → Search for “Ubuntu Server 16.04 LTS (HVM), SSD Volume Type”
Change Instance Type to T2.Medium
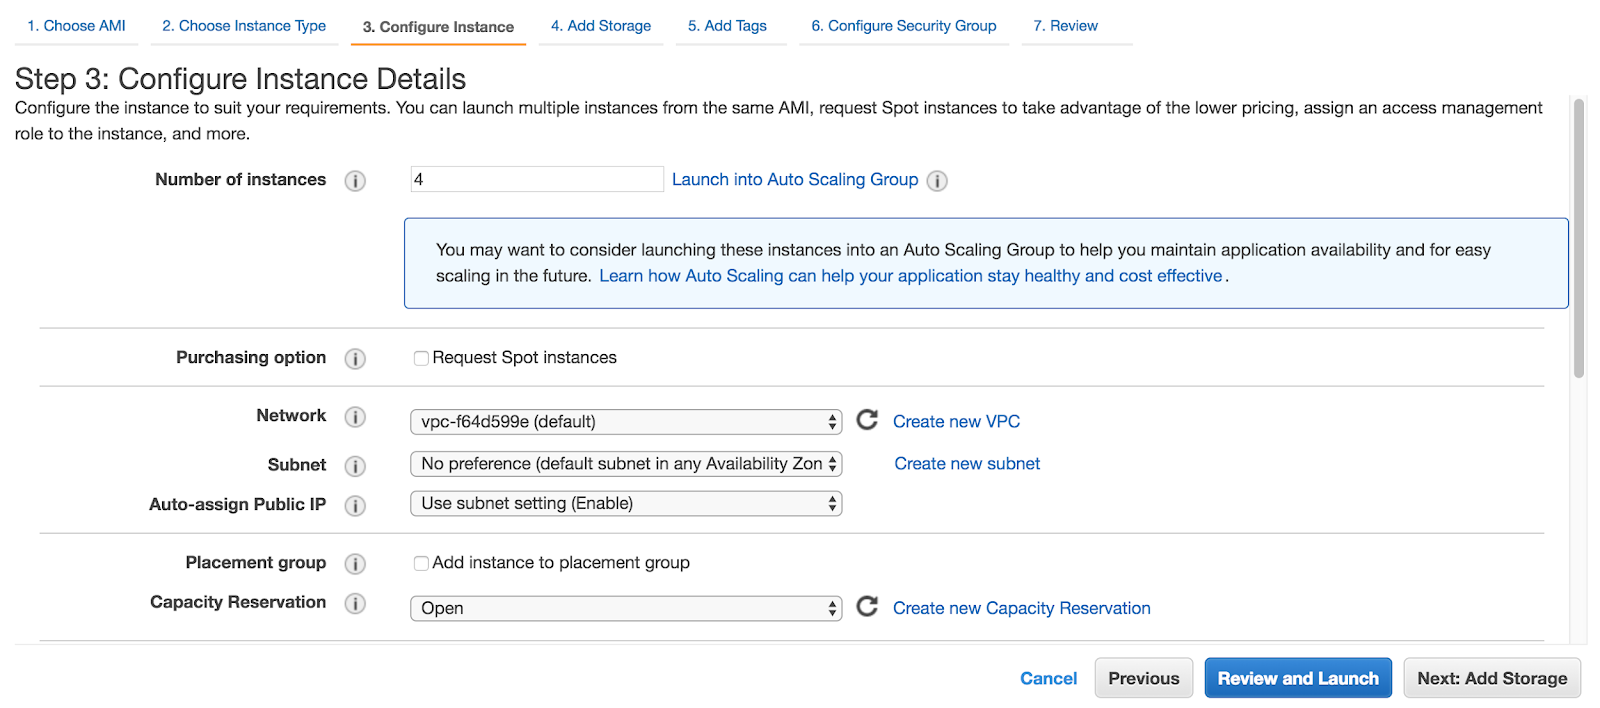
Click: Next Configure Instance Details and change Number of instances to 4
You can keep the storage default, which is 8GB, for this initial functional test. (You will need to consider adding additional storage “as needed” for your test case). Click on Add Tags.
Click on Next: Configure Security Group.
Use the existing security group which we created before.
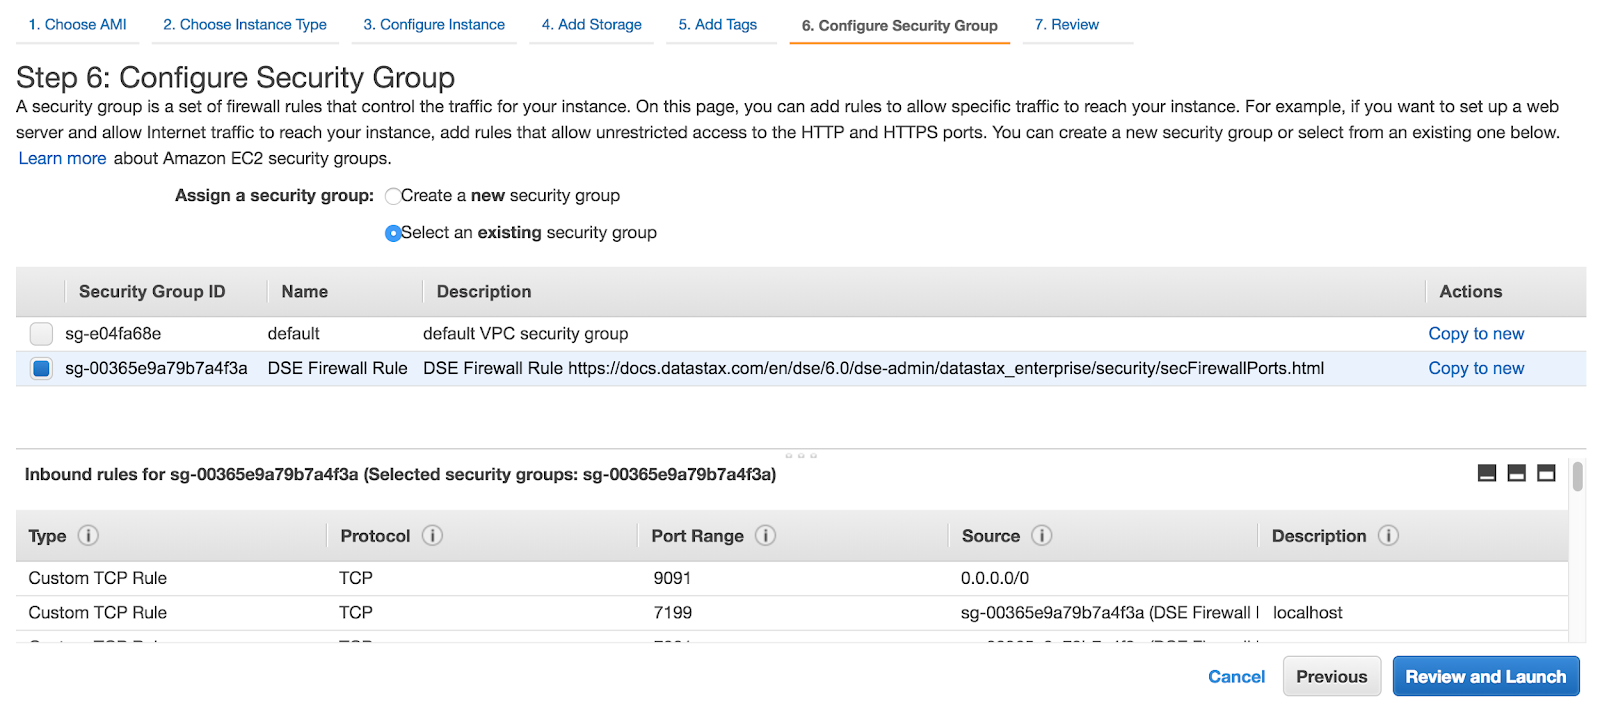
Click Review and Launch. It will also ask you to create a new SSH key. Make sure to save it. Now you would have 4 VM’s ready.
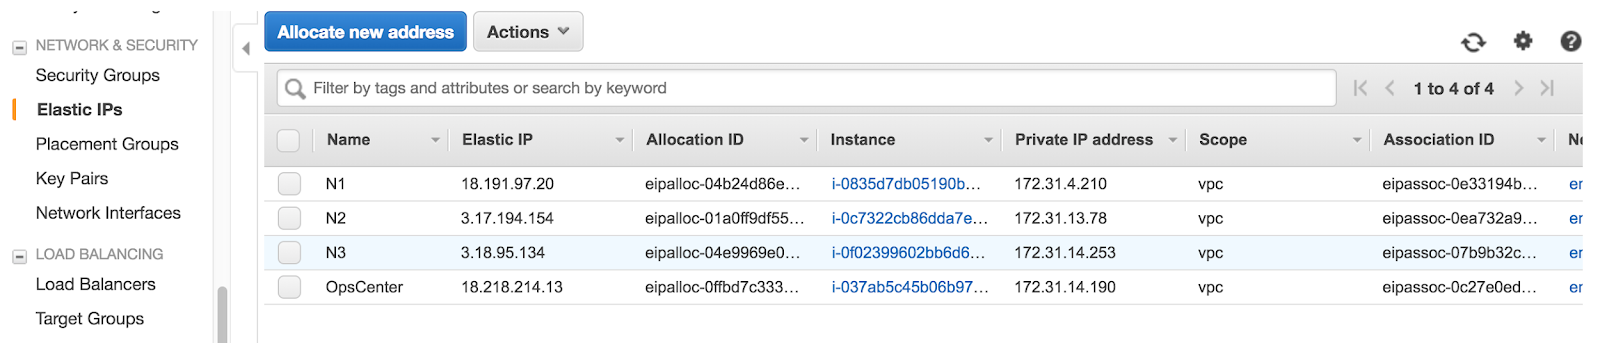
Note: In AWS the IP address changes once you bounce the VM. So navigate to Network & Security → Elastic IPs. Allocate 4 IP’s and associate them to the VM’s. This way we can preserve the IP address even if the VM’s gets rebooted.
2.) Install OpsCenter (Visual Management and Monitoring)
a.) Login to the OpsCenter Server on AWS
ssh -i ".pem" ubuntu@
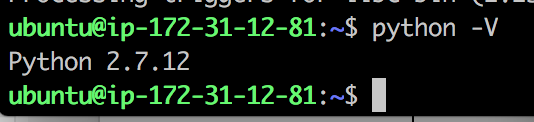
b.) Install Python 2.7
sudo apt update sudo apt install python2.7 python-pip python -V
A successful python install should look
c.) Install Java 1.8
sudo apt-get update sudo apt-get install openjdk-8-jdk java -version

d.) Install OpsCenter
Add the datastax Repository File and a Key
echo "deb https://DSA_email_address:downloads_key@debian.datastax.com/enterprise stable main" | sudo tee -a /etc/apt/sources.list.d/datastax.sources.list curl -L https://debian.datastax.com/debian/repo_key | sudo apt-key add - sudo apt-get update
You can generate your " downloads_key " from https://academy.datastax.com/downloads

sudo apt-get install libaio1 sudo apt-get install opscenter=6.7.0 sudo service opscenterd start ps -ef|grep opscenter
A successful startup of OpsCenter will show you a background process as below.

OpsCenter runs on Port 8888.
Lets validate using and access it using
http://:8888/
3.) Deploy a 3 node cluster using LCM (OpsCenter Life Cycle Management)
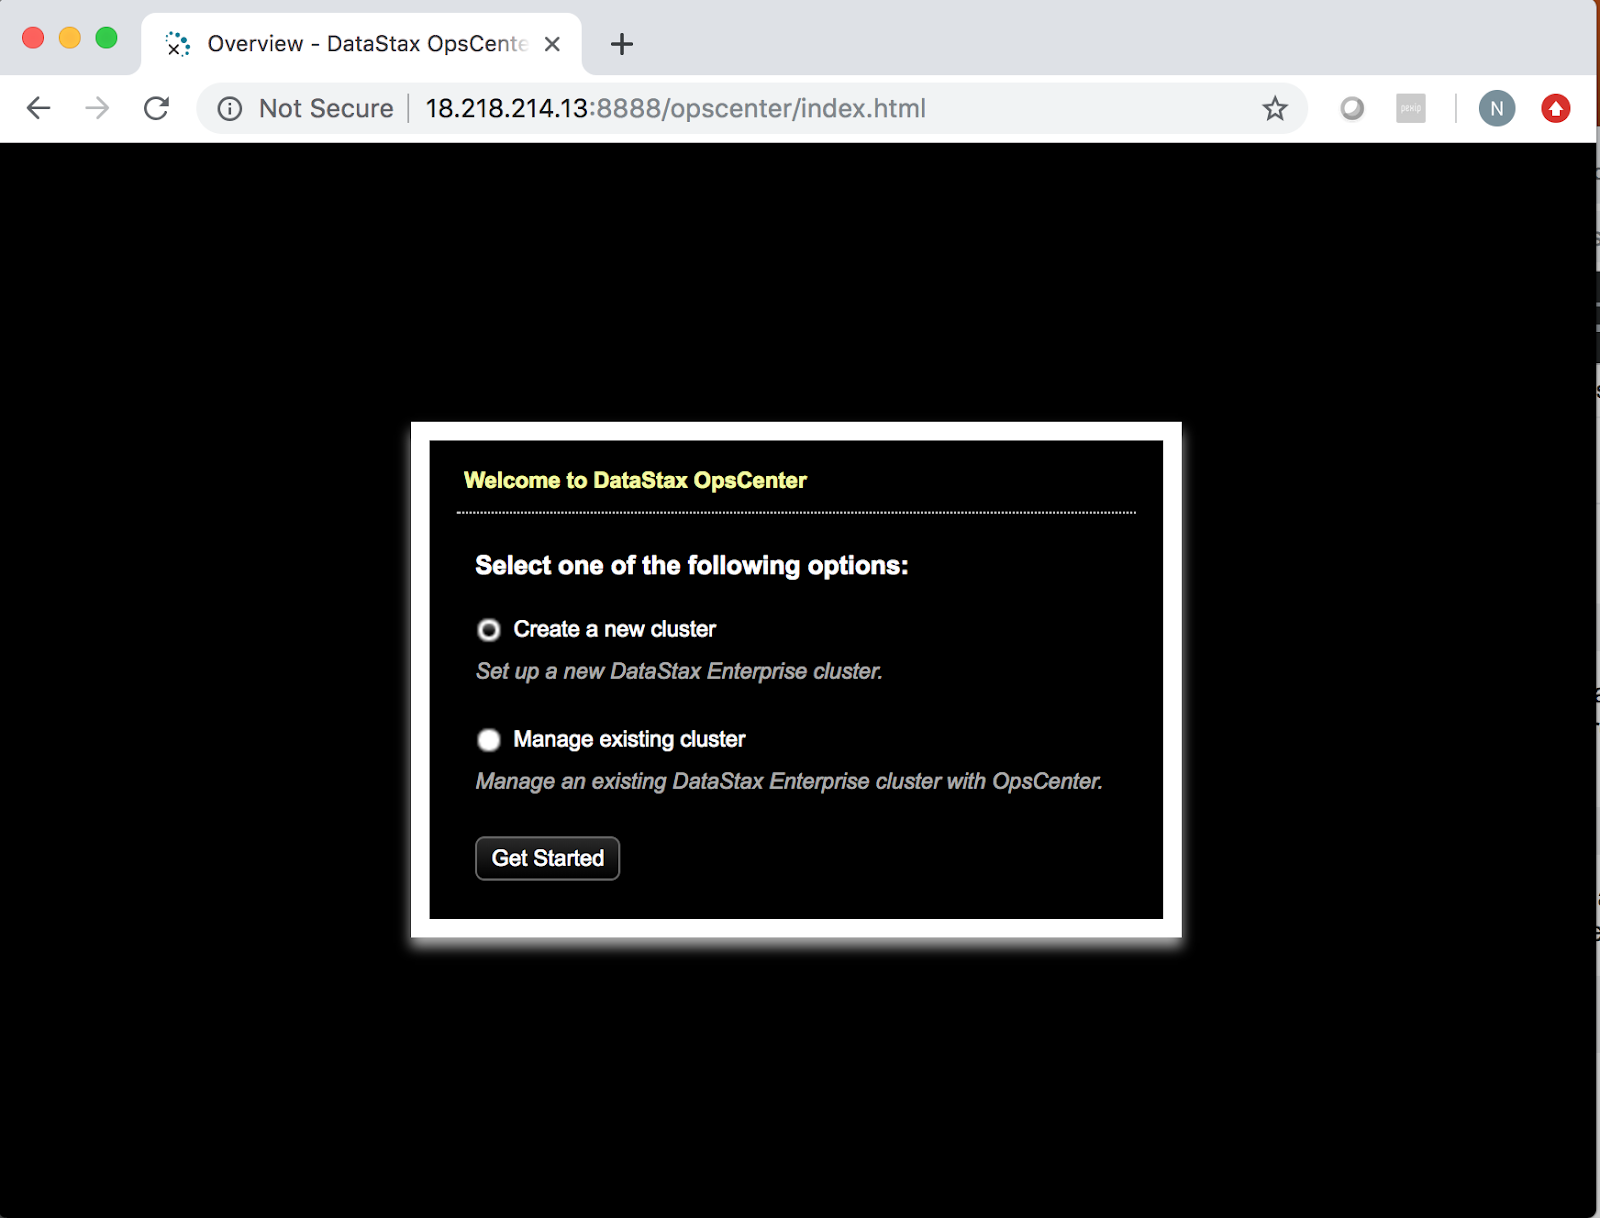
Access the OpsCenter as seen in the previous steps, select “create a new cluster” and click Get Started.
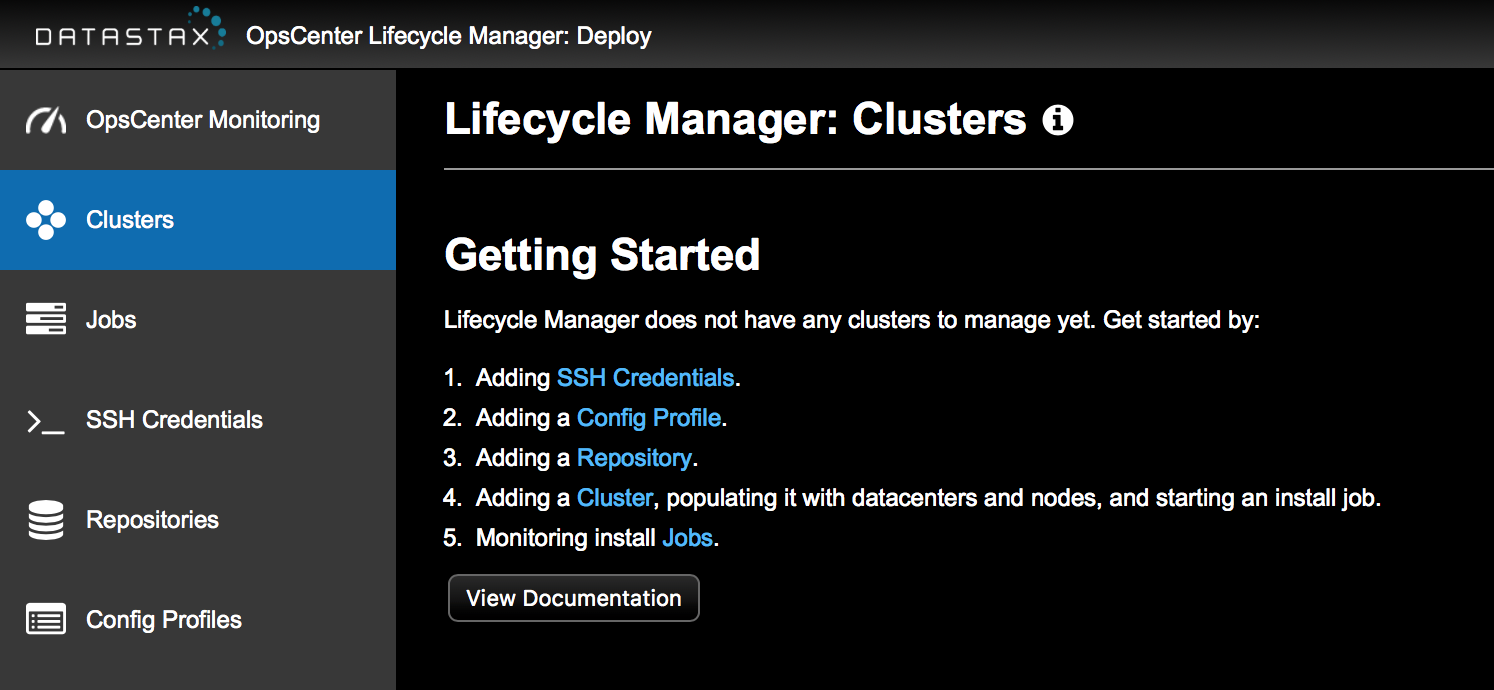
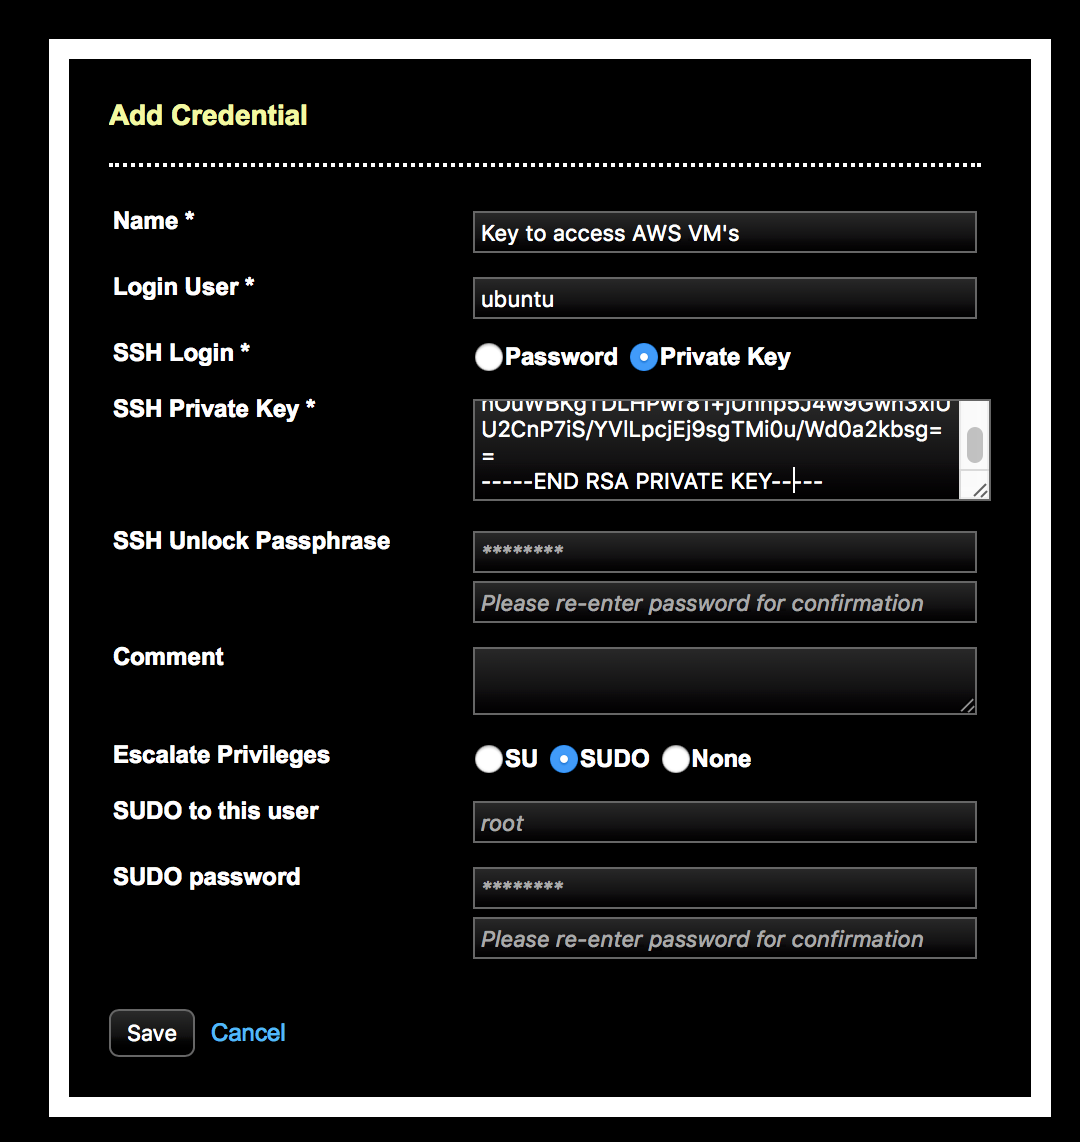
1. Add SSH Credential
OpsCenter LCM will use this key to access the VM’s created on AWS to deploy the cluster.
Enter Login User Name as: ubuntu
Copy paste the Private Key used to create the VM’s on AWS.
And Save.
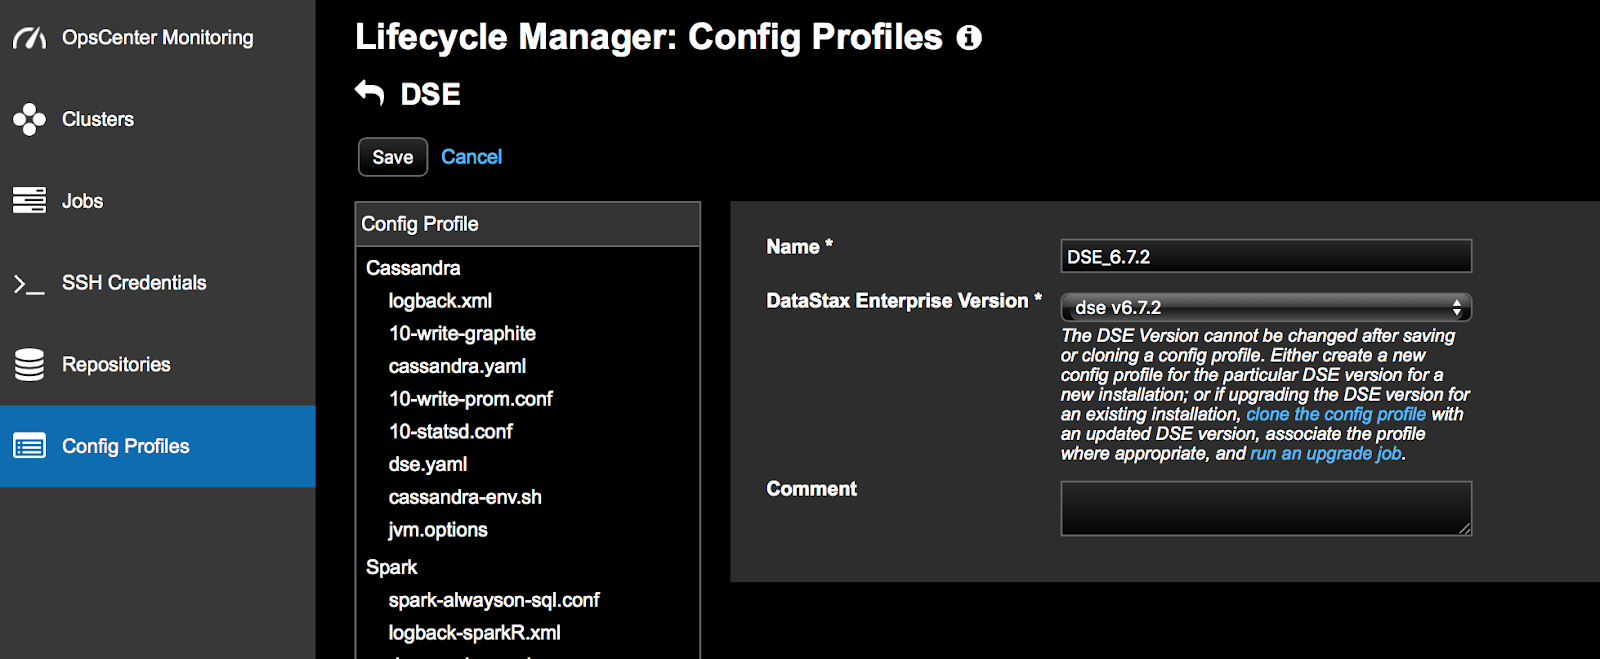
2. Add Config Profile
The config profile will deploy the version of DSE you wish to install. I have selected the latest version which is 6.7.2 from the drop-down box. And click Save.
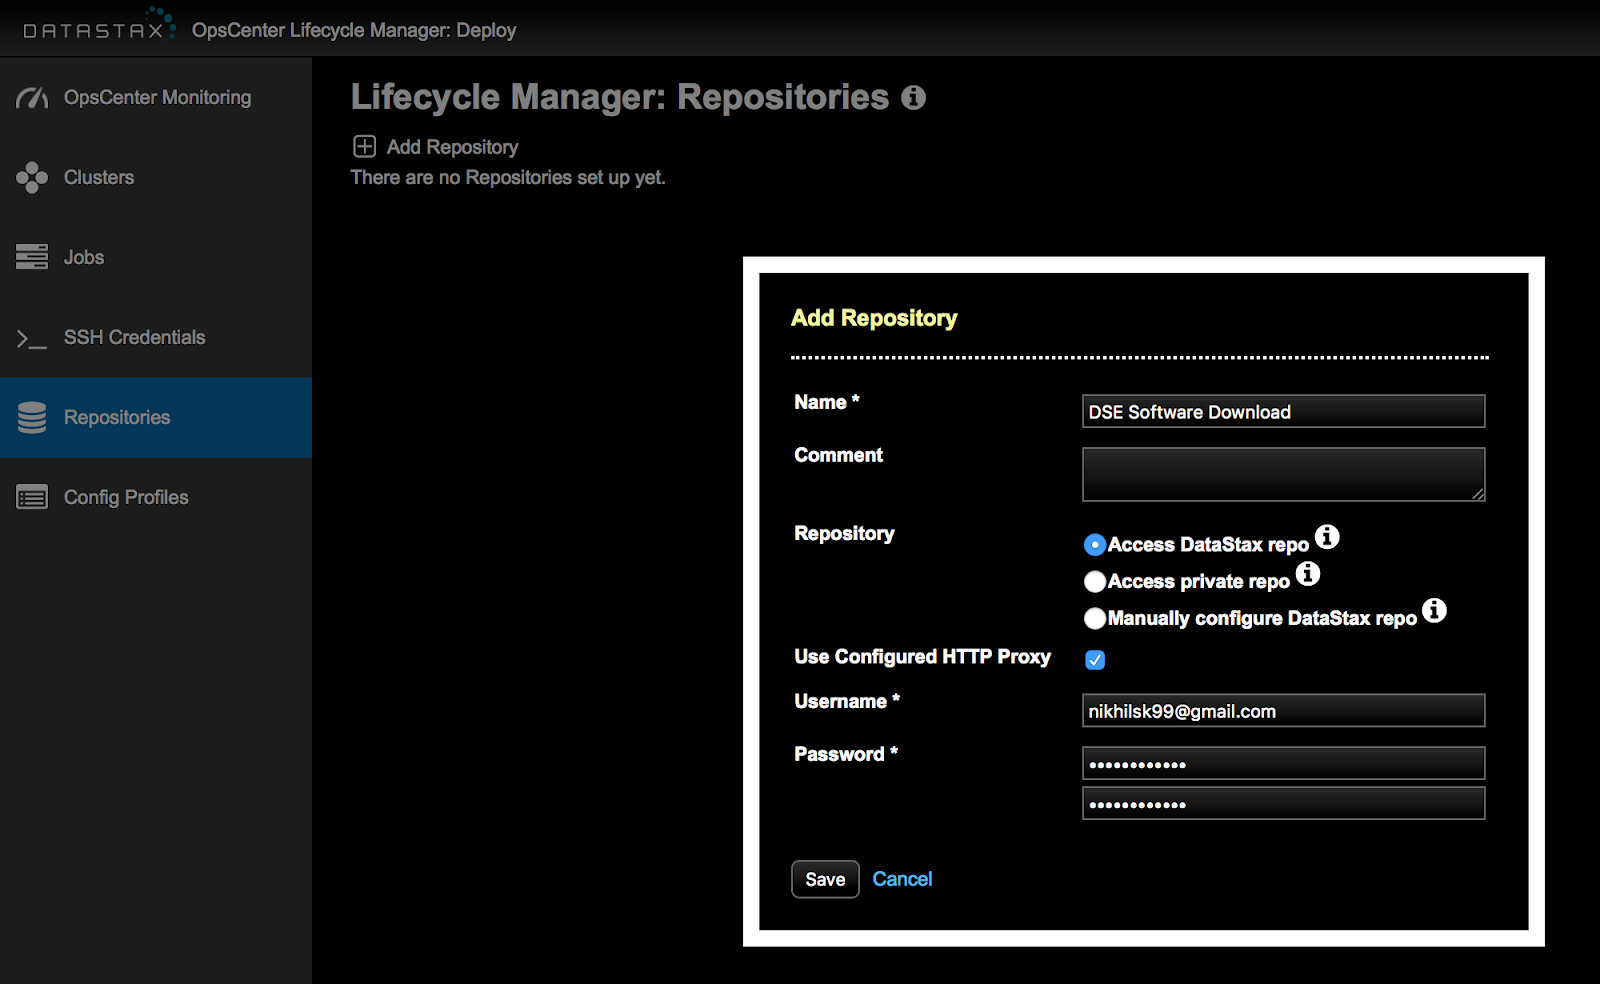
3. Add Repository
OpsCenter LCM will connect to the repository and download the software.
4. Add a Cluster
Let's name the cluster.
Select ssh credentials
Select the repository
Select the config profile
Enter the OLD password as cassandra
Enter the new password as per your password policy
Click Save.

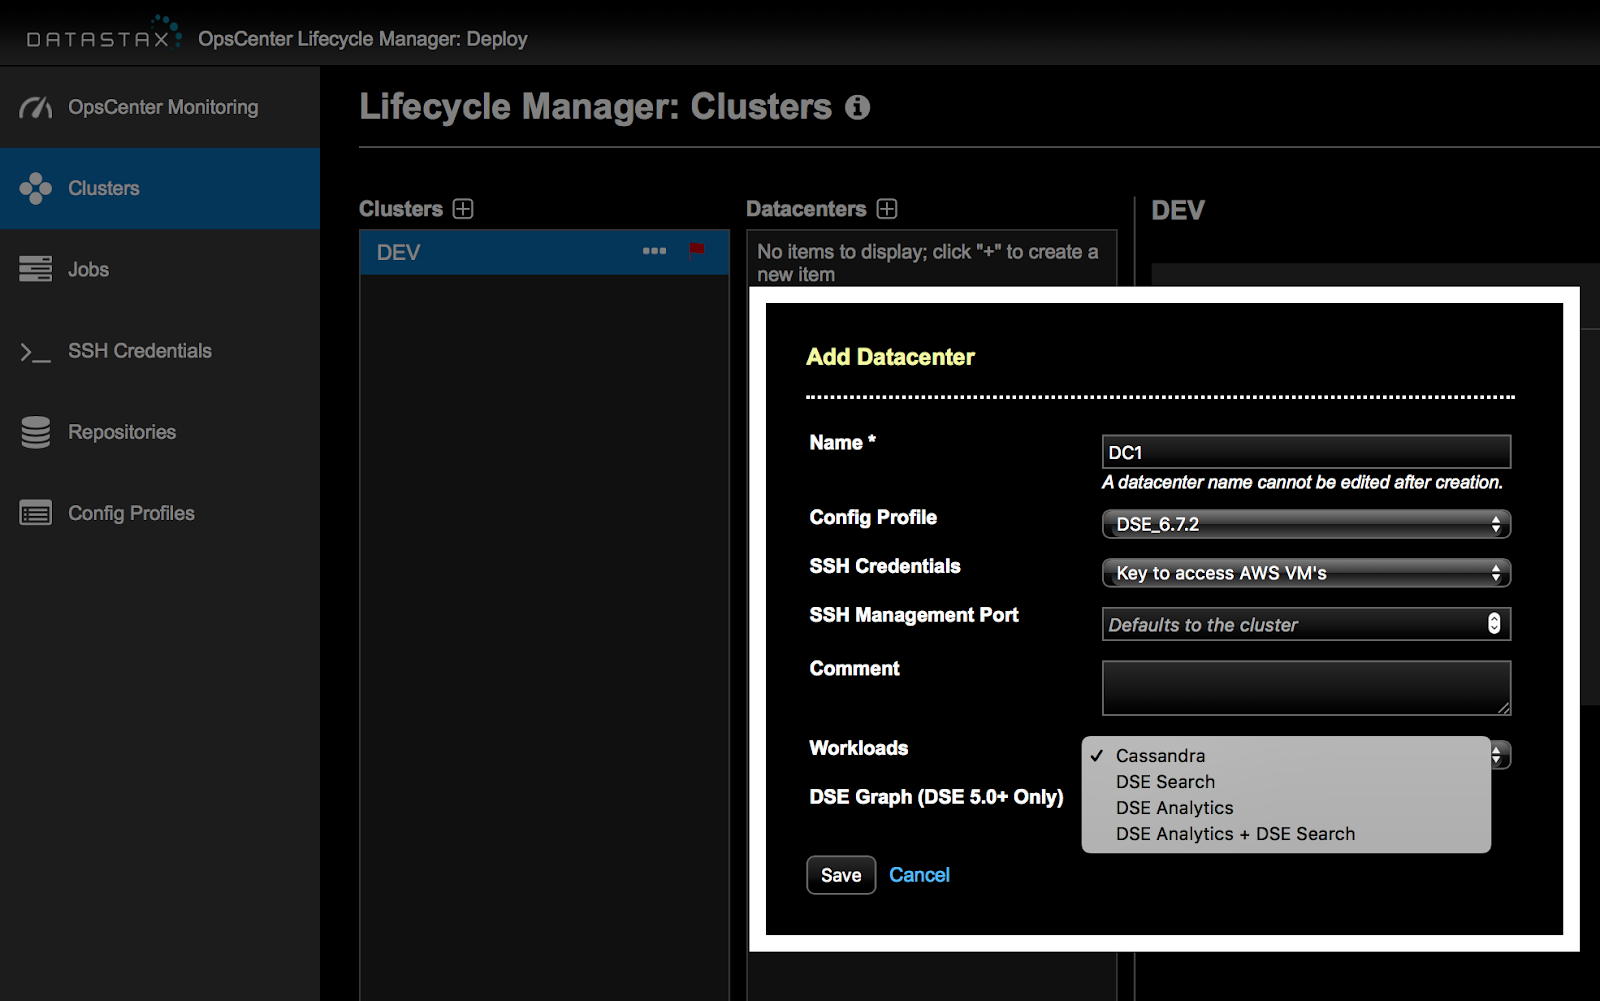
Click on the Cluster and a Datacenter tab will show up. Click the + sign on the datacenter tab and enter the below details.
Name for the DataCenter: DC1
Select the config profile from the drop-down box.
Select the ssh credentials.
Select the workload. In this example, I have selected a Cassandra WorkLoad.
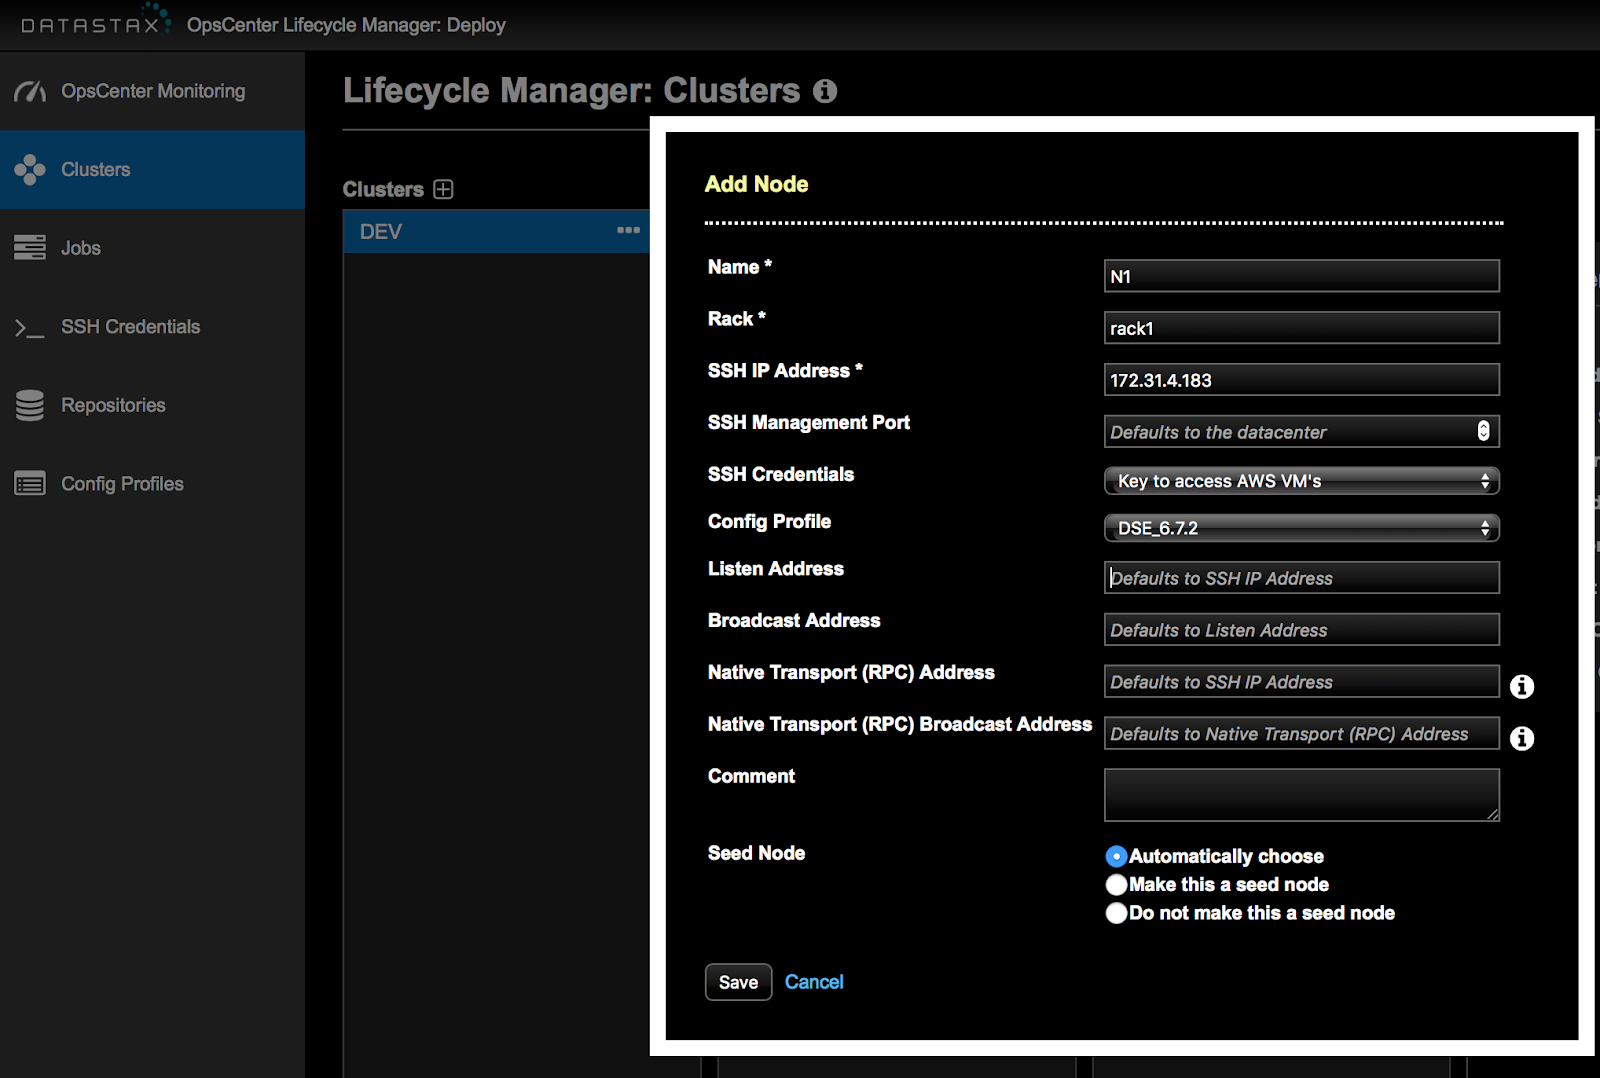
Add the Nodes
Click on the + sign next to the nodes tab.
Enter node name as N1
Enter Rack as Rack1
Enter the Private IP address of the VM that we created. Remember we
Select the ssh credentials and config profile from the drop-down box.
Click Save
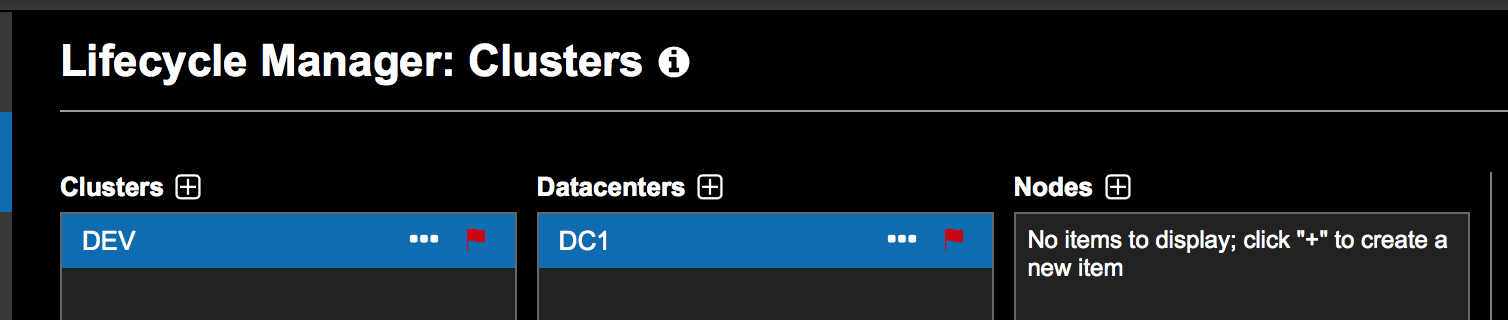
Similarly, Add the other two nodes N2 & N3 as seen below.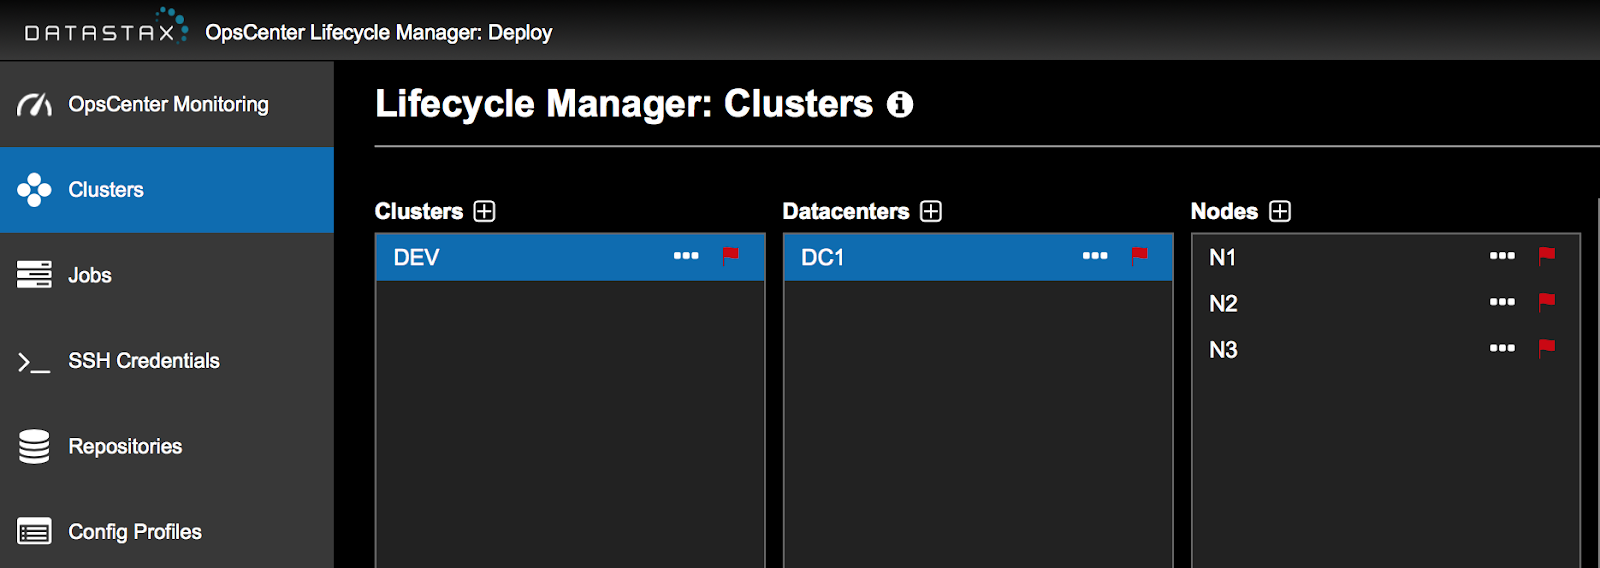
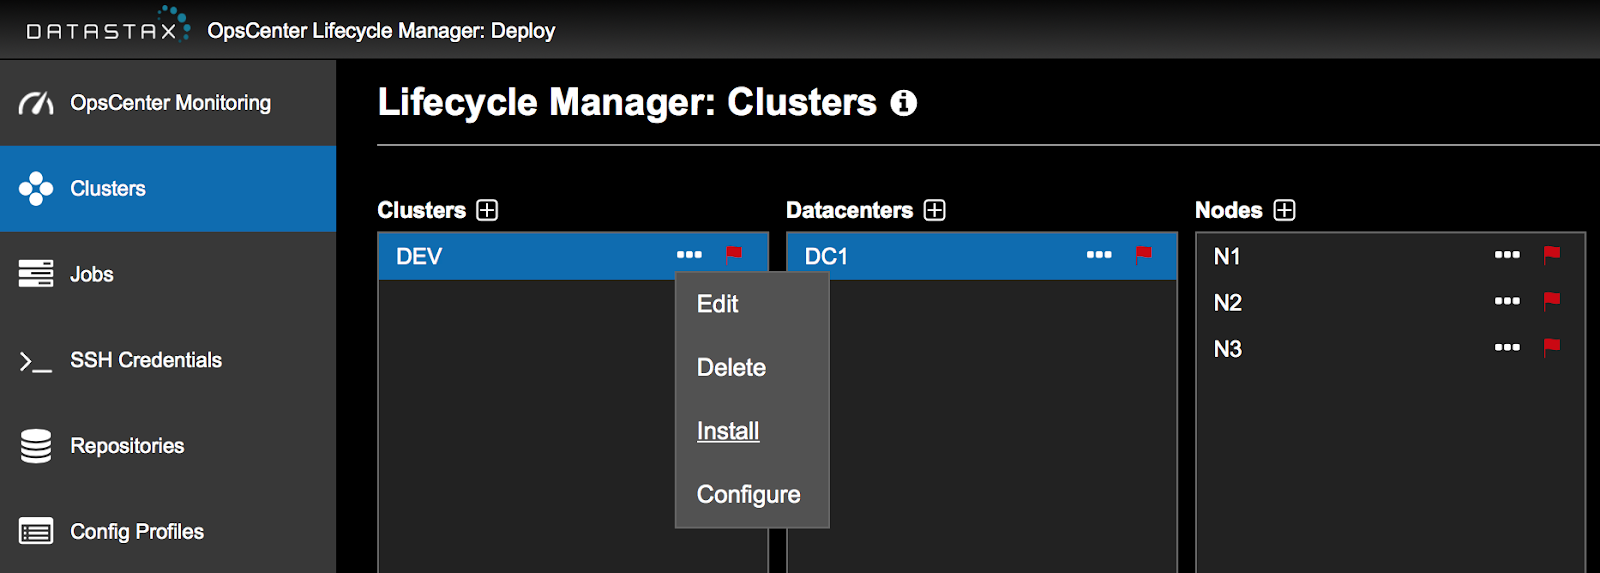
Click on the 3 dots you see next to the DEV in the Clusters Tab and click on install.
Keep the defaults and click Submit.
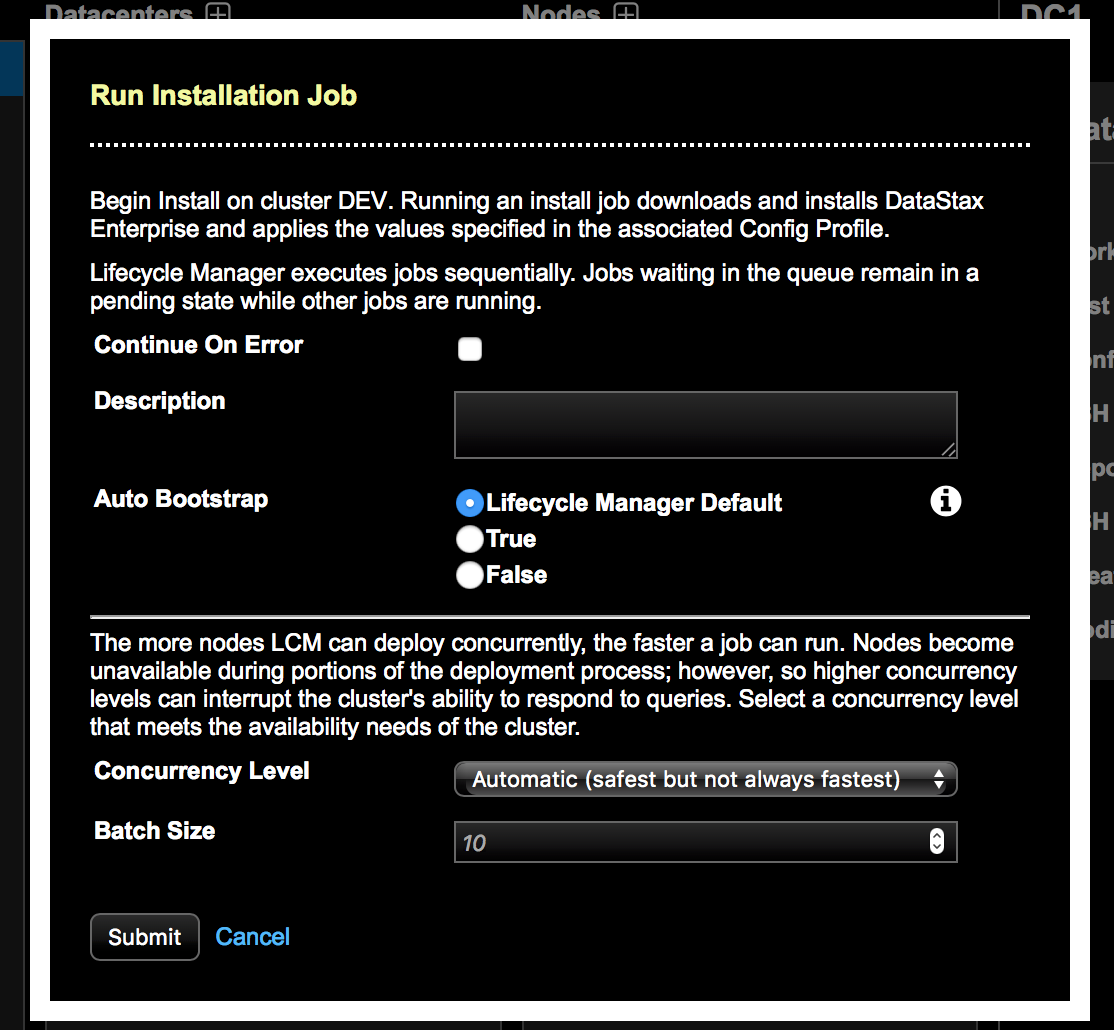
In the next couple of minutes, OpsCenter LCM will download and install the software on all the 3 nodes and create a one single DSE Cluster ready to use.
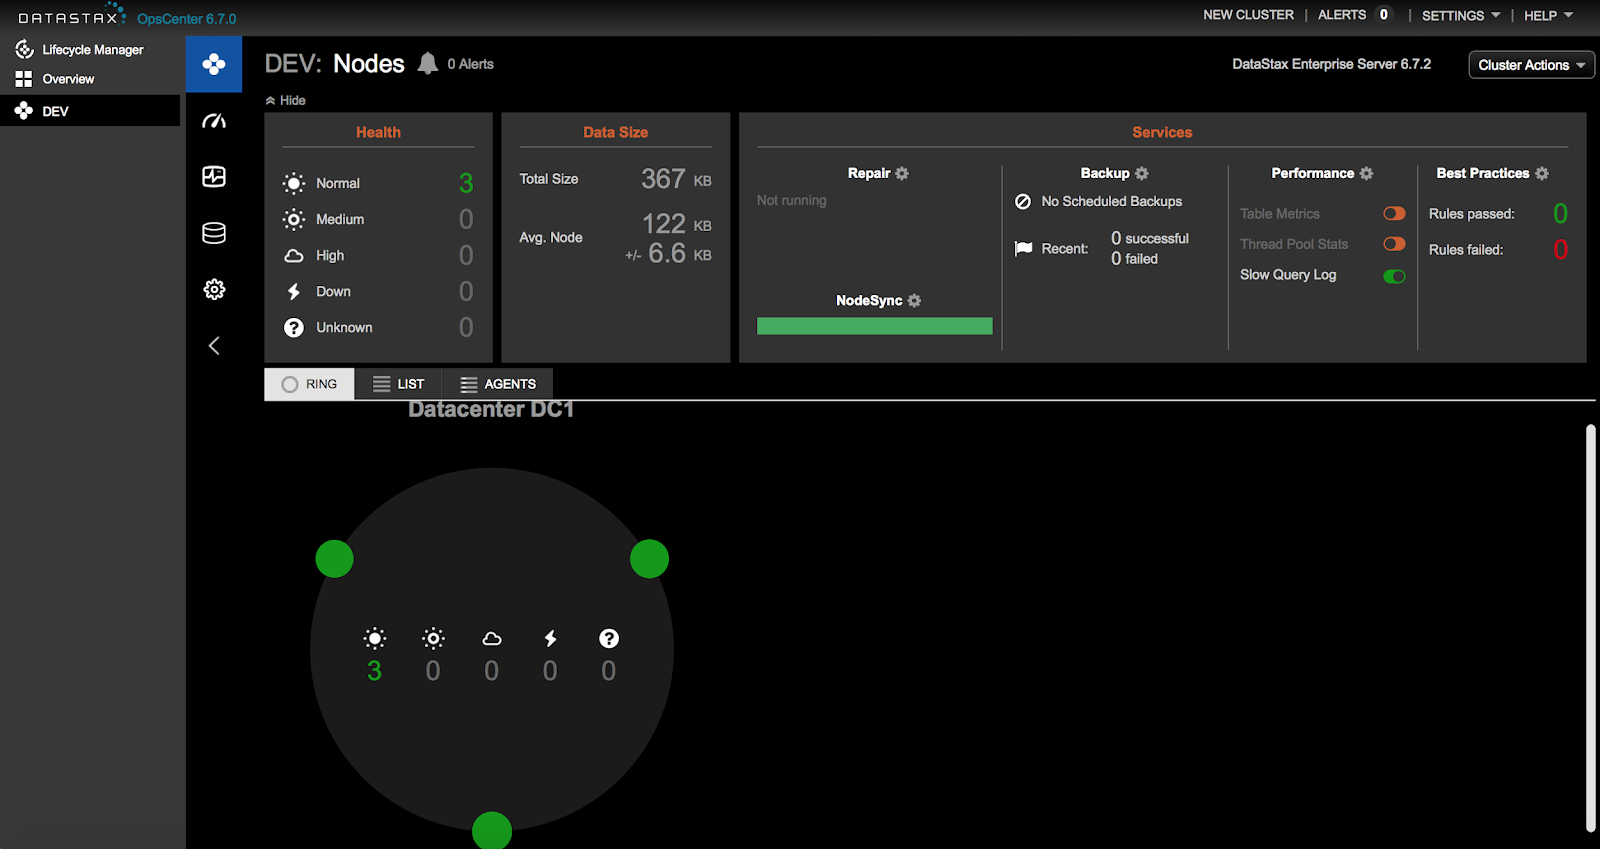
As successful install would look like this.
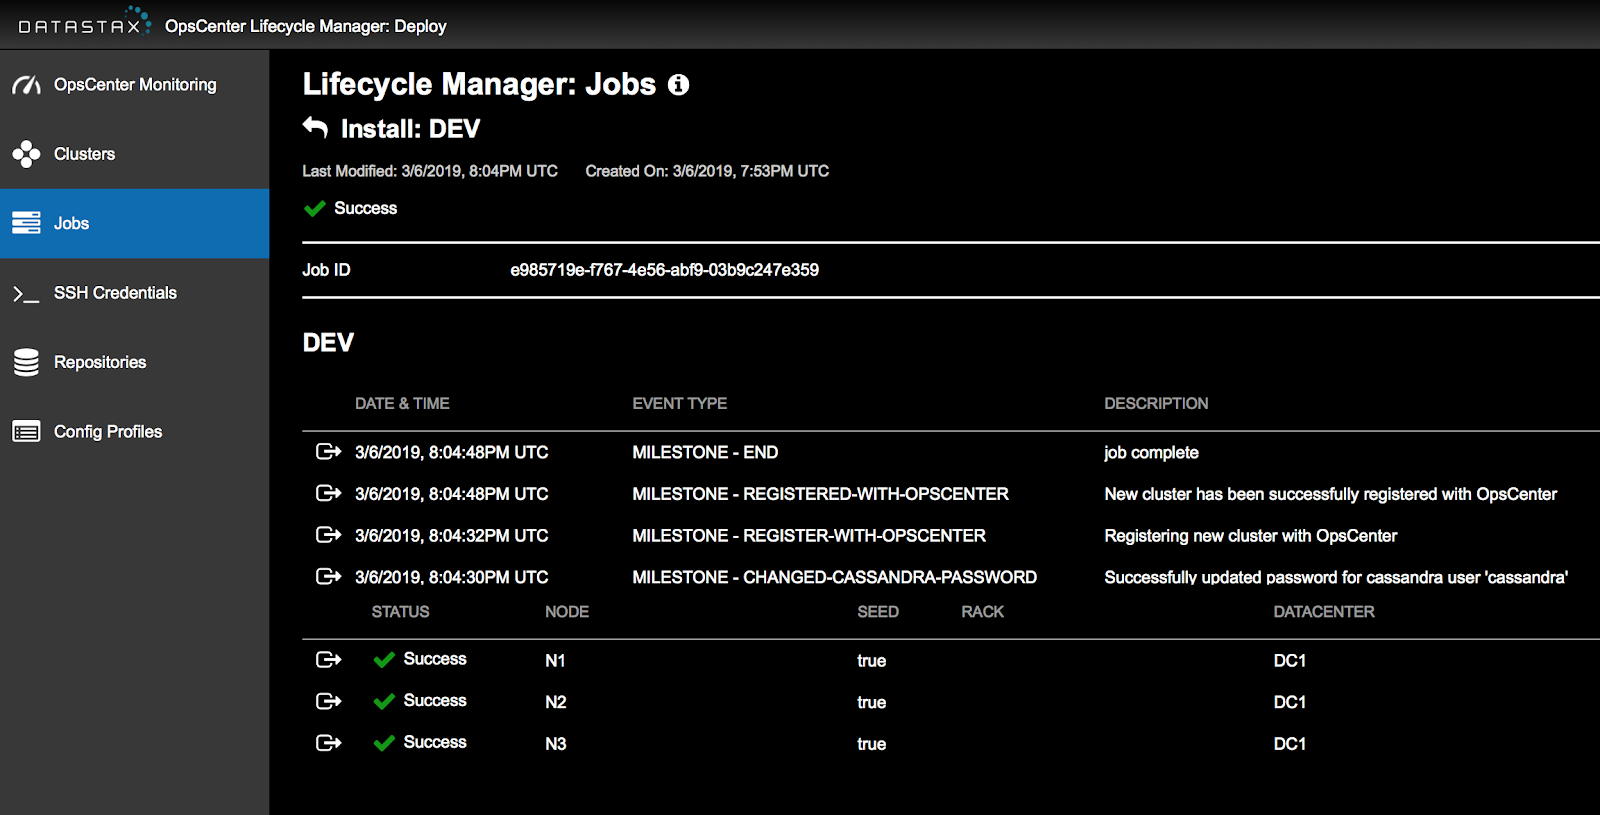
Click on OpsCenter URL to monitor and manage your cluster.