The DataStax Graph Loader is an important tool in the development of a DataStax Graph use case. While its primary function is to bulk load data into DSE Graph, it can be a great tool to help you familiarize yourself with some of the in's and out's (pun intended) of the DSE Graph. In this blog post, we'll show you how to think about the data, how to create a mapping script and the respective mapping functions. We'll also show you how to use DataStax Graph Loader, DGL for short, to speed up schema creation as well. There are many tricks and ways you can manipulate the data in DGL, though this guide will focus on the basics to start.
Perquisites for This Tutorial
- Learn some Graph
- DataStax Graph Loader
- DataStax Enterprise 5.0 or greater
- DataStax Studio 1.0 or greater (optional but helpful)
The Data We'll Be Working With in This Tutorial
We'll be utilizing this GitHub repo and its data for this tutorial. The data comes to us from the fantastic folks at pokeapi. I took the liberty of cleaning the data files and choosing the ones that had relationships applicable to a graph database. I've also changed the file and header names to help newcomers better understand what's happening inside DSE Graph. Obviously you might not have this luxury with larger, more complex data files. However, if you have the option, I highly recommend making sure key names are uniform across files. This will help immensely from an organization and coding perspective. Happy data == happy developer.
So how does the DataStax Graph Loader work?
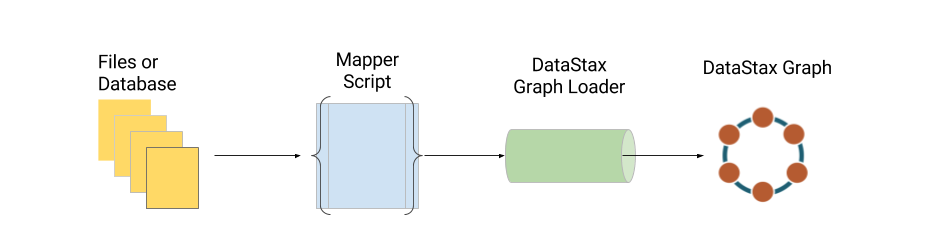
To put it quite simply, the DataStax Graph Loader (DGL) takes a mapping script that includes a file input and loads the data into a respective vertex or edge. That logic is handled by mapping functions within the mapping script. That's not all, though; it will cache the natural keys of a vertex that you specify within the mapper functions. This is to avoid inserting duplicate vertices within the same DGL run and speed up edge creation. Additionally, DGL can suggest a schema based on properties within a file based on how a mapper function is coded. Let's take a closer look using some nice and nerdy Pokemon data.
I Choose You, First Mapper Function!
Let's take a look at the pokemon.csv file. The header contains:
pokemon_id,pokemon,species_id,height,weight,base_experiencepokemon_id is the integer (Int) that is associated with a specific Pokemon. "pokemon_id" is important because this graph is pokemon centric (Pokemon360) and will utilize this ID when linking edges to respective vertices. The rest of headers are propertyKeys and their respective values.
We know that we want a vertex label called "pokemon", we have a pokemon.csv file that contains our data respective to the pokemon vertex, and we know that pokemon_id is going to be our identifier. That means we have everything we need to create a mapper function!
First, we'll need to take a file input (we'll talk about input directories further down) to wrap our function around:
|
1 2 3 |
|
Here, we're telling DGL that we want to load 'pokemonFile' (which will map to the 'pokemon.csv' file) as vertices. Next, we'll want to tell DGL the name of our vertex label as well as the identifier, or key, we want to use:
|
1 2 3 4 |
|
That's it! Pretty simple right? DGL will automatically take the rest of the header and map the data to the respective propertyKeys. There's obviously a lot more you can do within a mapper function such as transform and manipulate the data but that's a lesson for another time. There are plenty of vertices you can create with the other data files provided, so give it a shot!
Living on the Edge
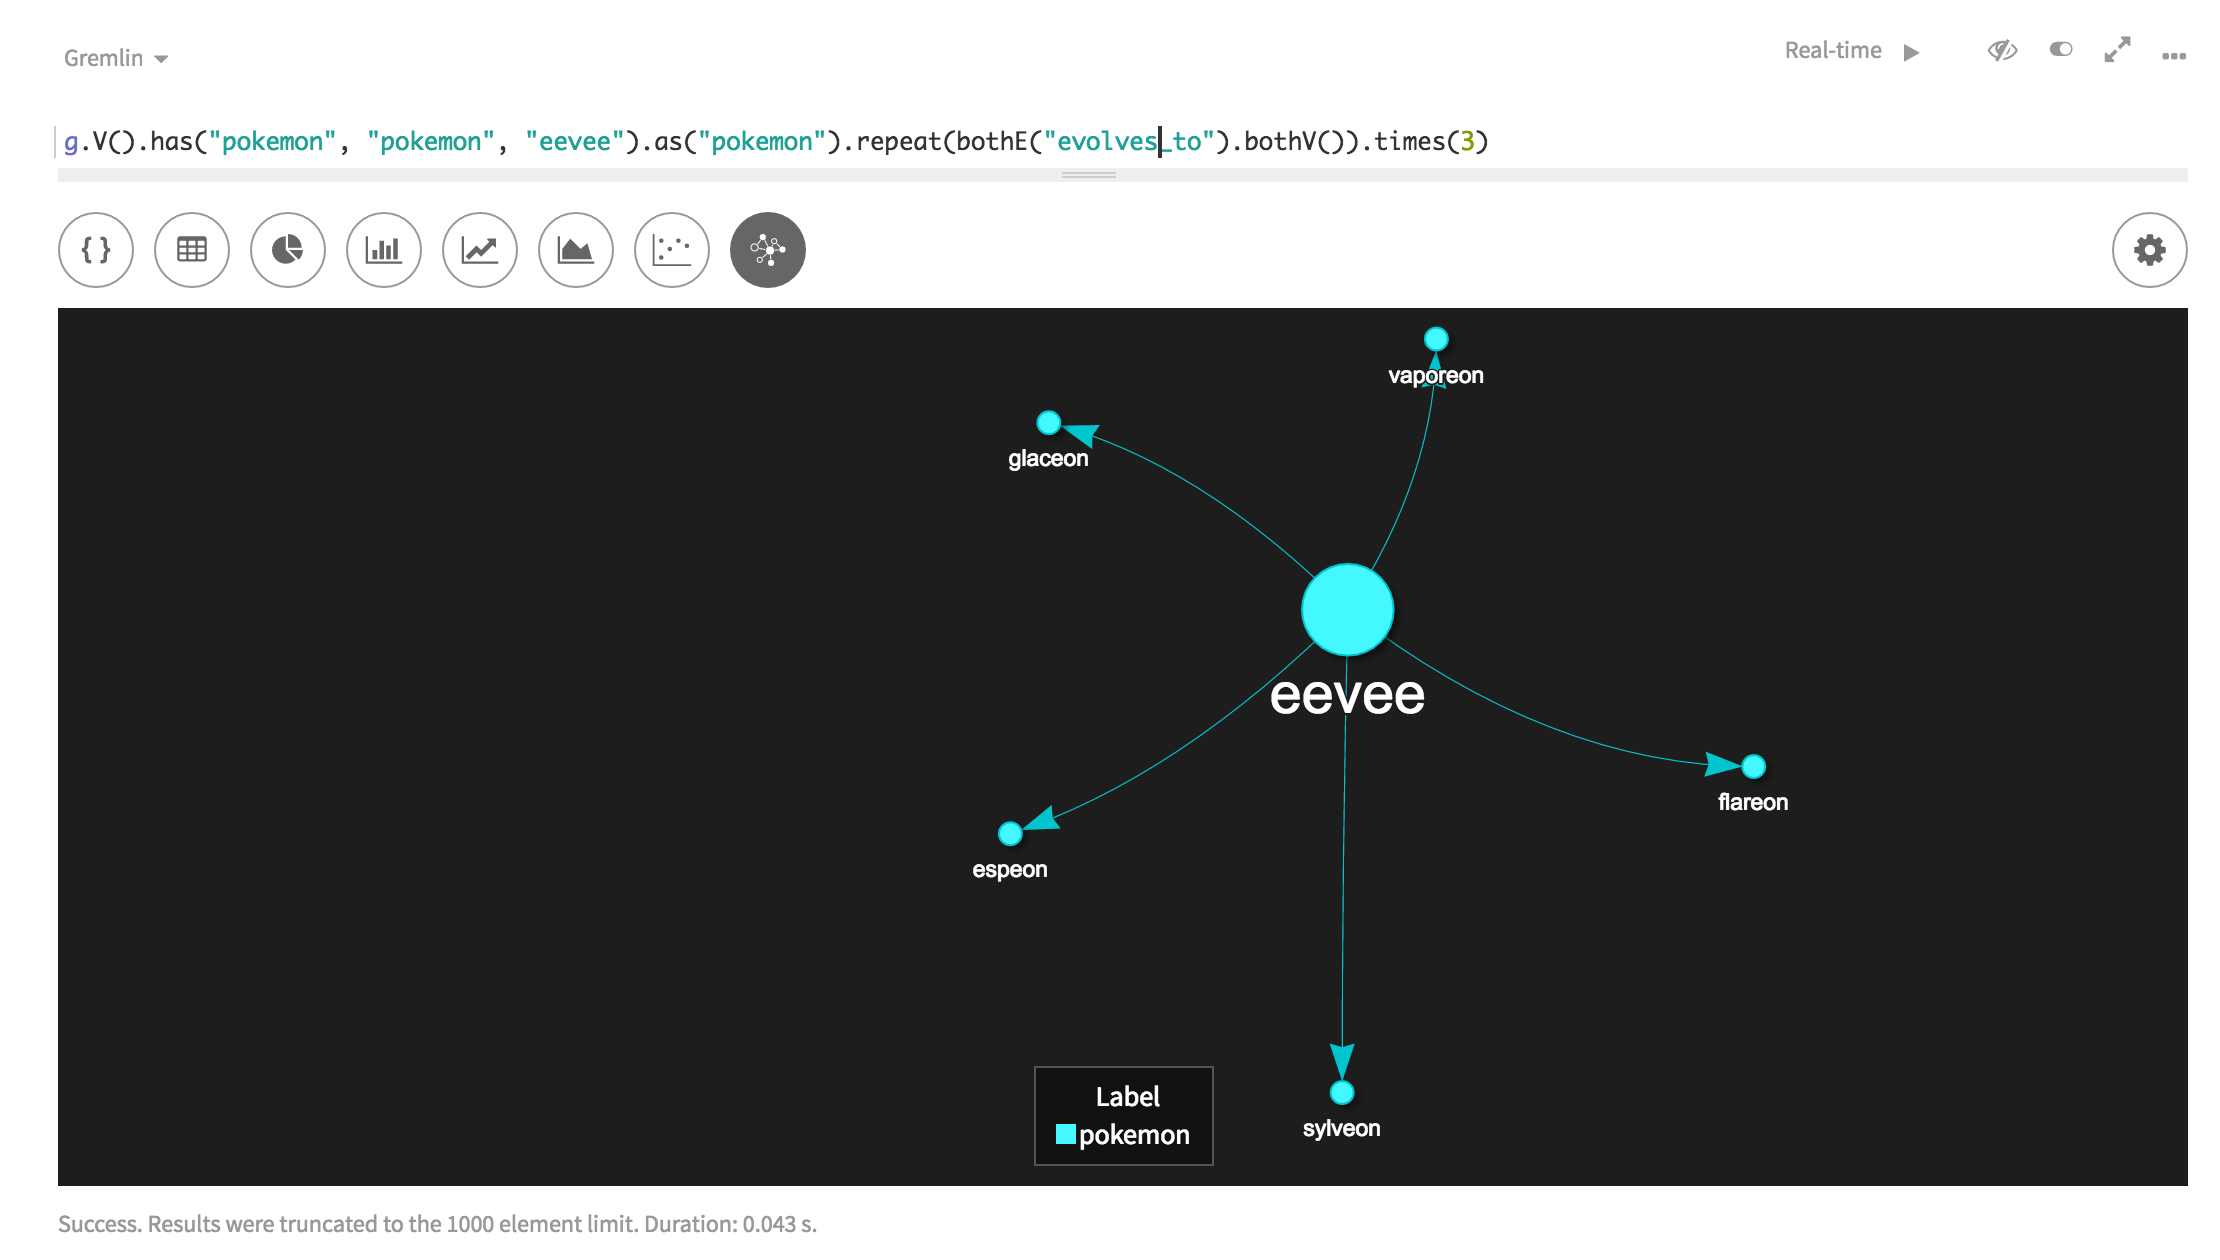
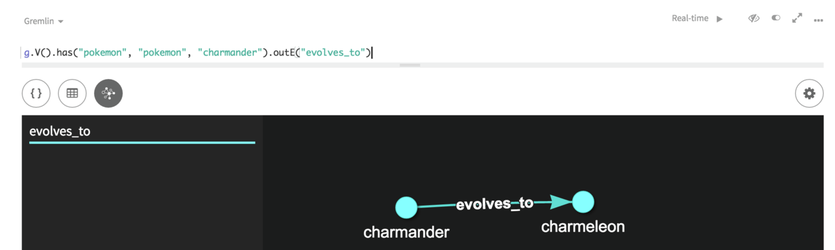
I haven't played a Pokemon game since the originals but there's one thing most of us know; Pokemon evolve into other Pokemon. That relationship can look like pokemon - (evolves_to) → pokemon. So how do we tell DGL about that relationship?
One of the files I've created for the evolution chain is called "pokemon_evolves_to.csv". You'll notice that I like to name my respective vertex files and edge files to correspond with the relationships they represent. It's another way to stay organized when dealing with a lot of files. Inside the CSV, you'll notice there are two identifiers - 'from_id' and 'to_id'. Both of these represent a pokemon_id as one Pokemon evolves to another.
One thing to keep in mind is that you always want to have the outgoing and incoming vertex ID in the same file for a respective edge. That's how DGL can load the right edges between the respective vertices.
Just as before, you'll need to tell DGL what you're loading:
|
1 2 3 |
|
Notice how we're loading this file asEdges now. Next, we'll need to give this edge a label:
|
1 2 3 4 |
|
Here comes the tricky part. We'll need to tell DGL which keys in the CSV belong to the outgoing and incoming vertices and which respective vertex labels they correspond to:
|
1 2 3 4 5 6 7 8 9 10 11 |
|
Remember, 'from_id' in the CSV file represents the original 'pokemon_id' and 'to_id' represents the 'pokemon_id' it evolves to. Because the evolution goes from one Pokemon to another, the label and key are the same in the outV function and the inV function. There aren't any additional properties associated with this CSV but if there were, they'd also get loaded into the respective edge.
Keep in mind there are plenty of edges you can create between the vertices you made above - check out the files in the /data/edge/ and give it a go!
Dude, Where's My Data?
Next, we'll quickly look at how to specify input files. By now, you know I'm all about organization. Therefore, I like to split my data directories between vertex and edge data. It's not necessary, because the files can be read from the same directory, but it's something I like to do.
First, we need our input directory:
|
1 2 |
|
Then we'll map the actual files:
|
1 2 |
|
As you can see, we're telling DGL that the file is a CSV and has a specific delimiter. You can also provide a header if the files don't have one by adding:
|
|
Also note that DGL is capable of loading much more than just CSV files. Check out our documentation for more info on this.
Are We There Yet...?
Almost. Now you've created your first mapping script masterpiece. With all the pieces together, it should look something like the code linked here. Those with a keen eye will notice that there is an additional config line at the top of our mapping script. These can be passed via command line arguments as well. To get a full list of what you can do and what they mean, take this doc reference for a spin. Here's what the ones we specified mean:
| create_schema: | Whether to update or create the schema for missing schema elements. |
|---|---|
| load_new: | Whether the vertices loaded are new and do not yet exist in the graph. |
| load_vertex_threads: | Number of threads to use for loading vertices into the graph |
Ok but Wait, What About My Schema?
You have two options:
- Type out all of the schema by hand (hint: there's about 75 or more lines)
- Let DGL suggest and create the schema
I'm going to assume you want to go with option #2. Because we created the vertex and edge logic within our mapper functions, DGL can infer the proper schema and indexes. To take advantage of that, we'll need to run DGL in dryrun mode so that it loads no data. You always want to have an explicit schema when loading the actual data - that will make a huge difference in performance. Here's what the command looks like:
|
1 |
|
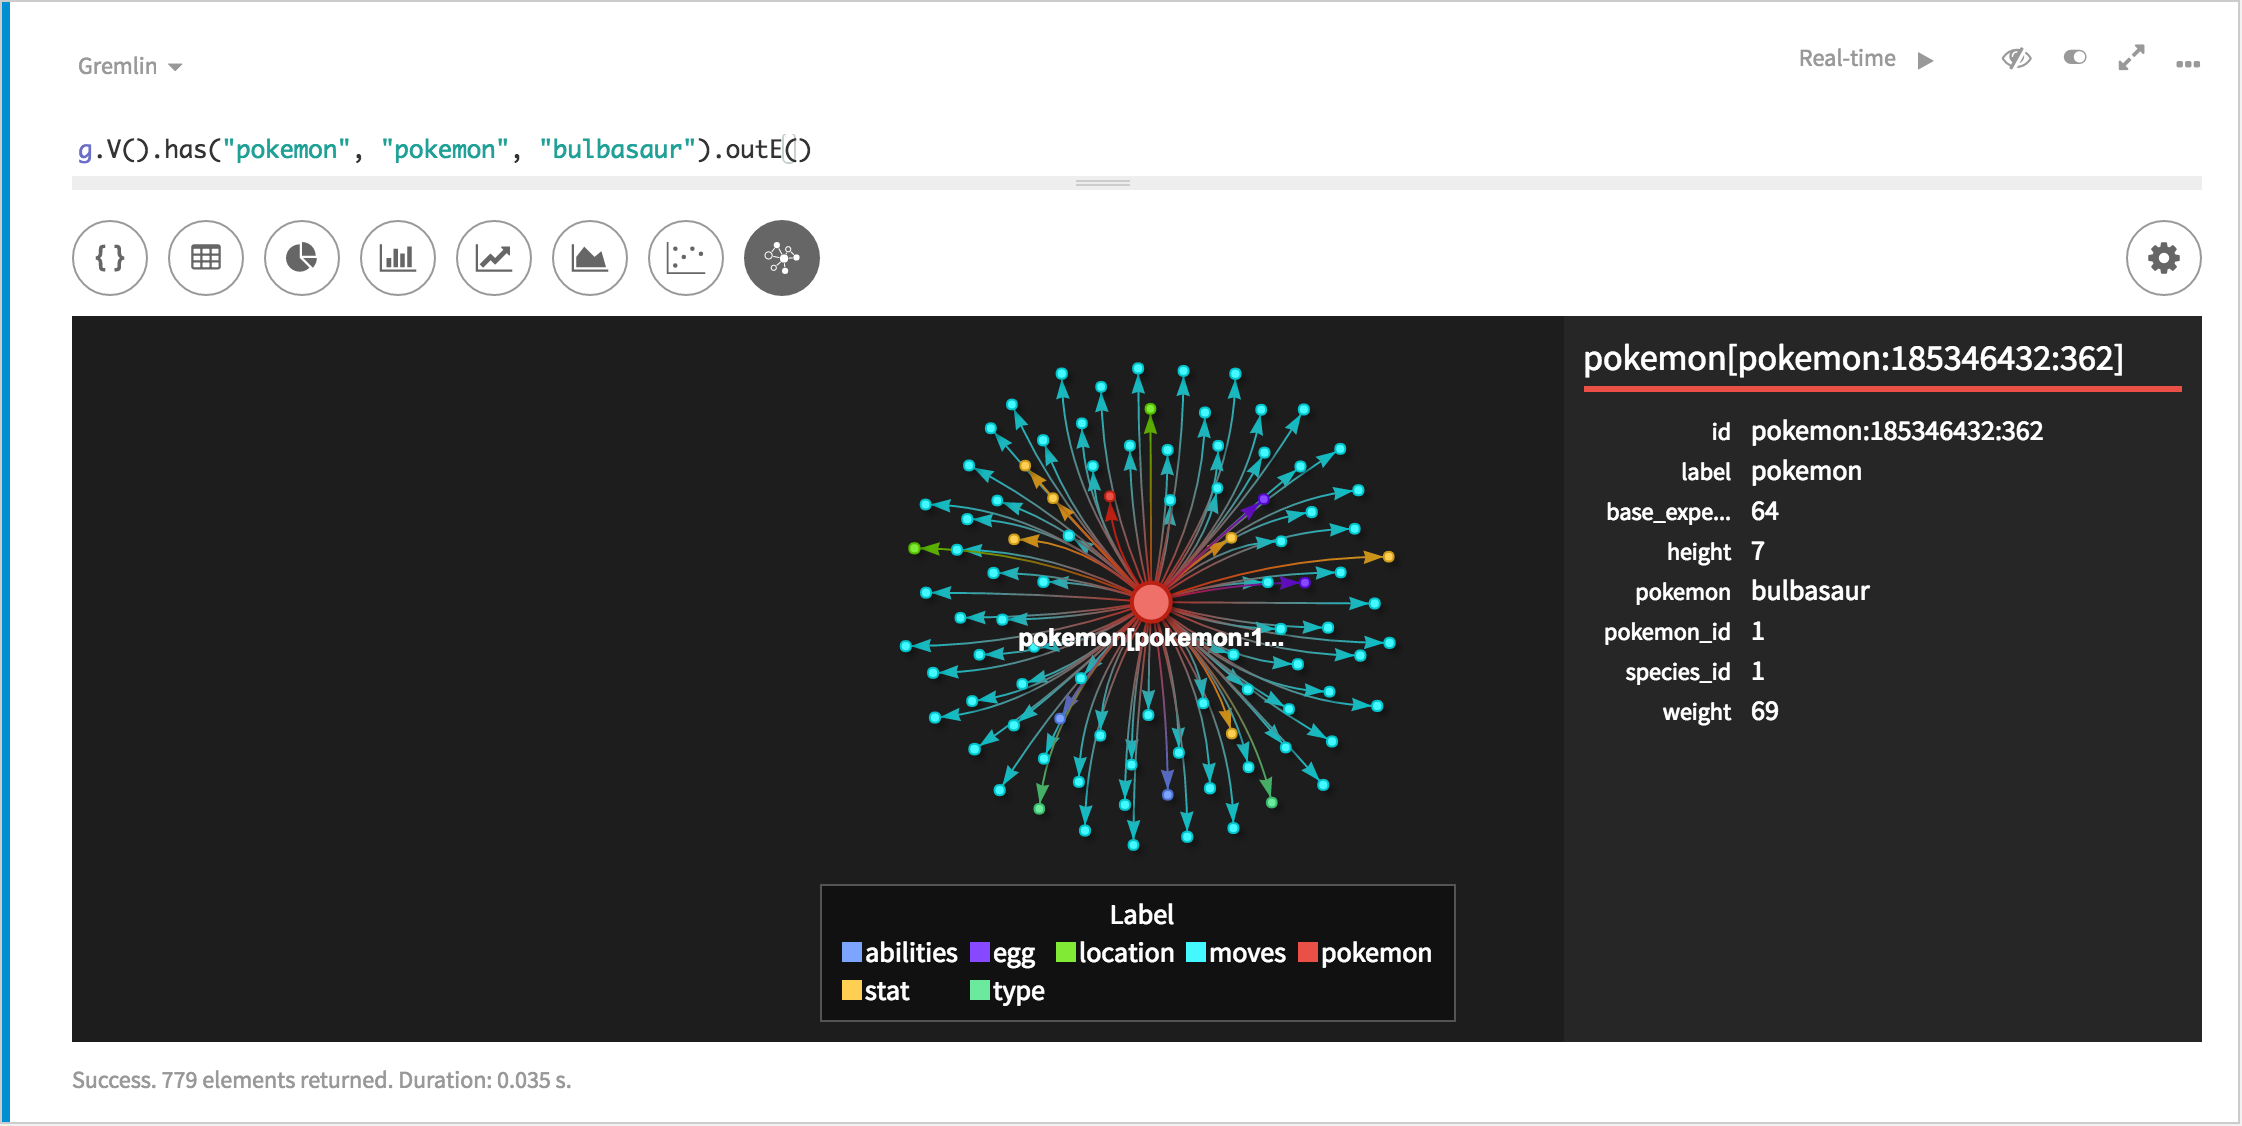
When it finishes running, you'll see the output that is your schema. You may notice that it has inferred something as Text when it should be an Int. Feel free to change that in the schema before applying it. The end result for this example is linked here. I usually take the schema, load it via DSE Studio to have a visual aid, and watch the fireworks:
Let's Load Some Data For Reals
This is it! Let's get our data actually loaded into the graph. The command is fairly similar to the one we used above:
|
1 |
|